Blog
Create a Book From Photos Your Kids Will Actually Read
Learn how to create a book from photos that turns your family memories into a cherished keepsake. Our guide offers practical tips and ideas.

If your phone is anything like mine, it’s overflowing with photos. Holidays, school plays, lazy Sunday mornings… you’re probably sitting on a storytelling goldmine without even realizing it.
You can create a book from photos by finding a simple story hiding in those pictures, picking your favorites, and then letting a service like ours bring it to life in print. The whole process is so much easier than you think, and it turns a chaotic camera roll into a storybook your kid will actually beg to read.
Turn Your Camera Roll Into a Cherished Storybook
This guide is your starting point for turning those digital memories into a printed storybook your child will ask for every single night. We'll show you how to frame this as a fun, meaningful project—not just another thing on your to-do list.
There's something magical about seeing themselves as the hero of their own story. It’s a powerful boost for their confidence and turns bedtime reading into a personal, memory-filled experience.
The process is pretty simple when you break it down: start with your photos, find the story within them, and then build the book.
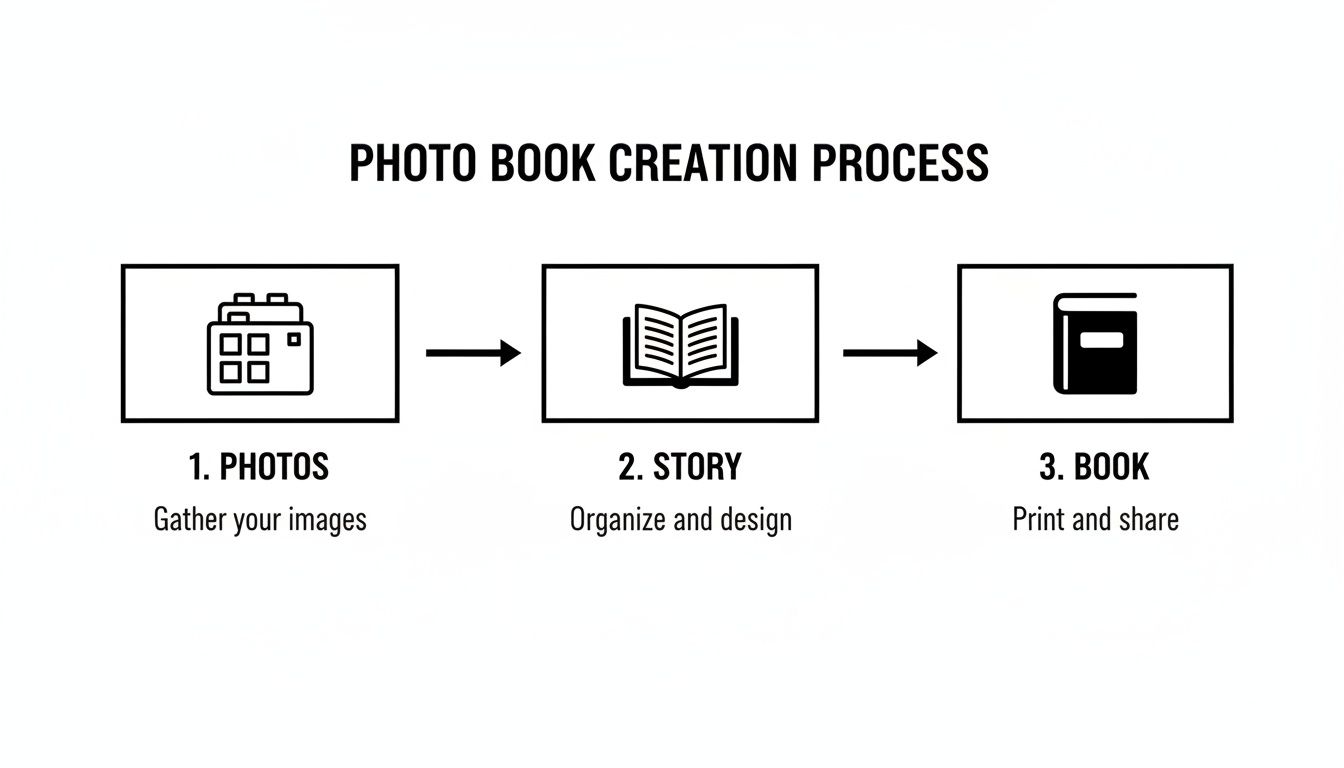
Your camera roll holds the potential, the story gives it heart, and the final book makes that feeling something you can hold in your hands.
Why Personalized Photo Books Matter So Much
You don't need to be a writer or a designer to create something beautiful, especially with intuitive platforms designed for parents. The real magic isn't in fancy layouts; it's in the personalization.
A Deeper Connection: Kids develop a stronger sense of self and belonging when they see their own faces and experiences reflected in the books they read.
A Boost for Literacy: It’s no surprise that personalized stories grab a child's attention. They get genuinely excited about reading when they are the main character.
Real, Tangible Memories: A printed book creates a permanent, screen-free way to relive family moments, from that big vacation to a quiet afternoon building forts in the living room.
Personalization is what makes these books so special. In fact, a recent survey found that a whopping 75% of people prefer custom photo products for gifting. It just goes to show how much we value things that feel uniquely ours, making them a perfect fit for a one-of-a-kind bedtime story.
To really bring your vision to life, it helps to use the right tools to create your own story book that make the process simple and fun.
And if you're looking for more ideas, we have a whole post dedicated to making unique family picture books.
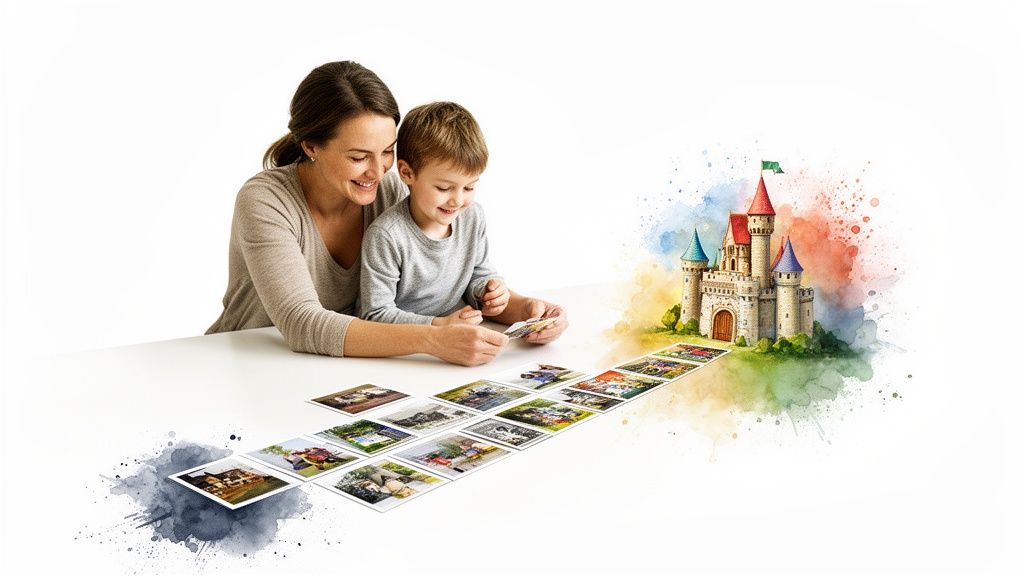
Finding the Story Hidden in Your Photos
Before you even think about software or page layouts, the real magic starts with a simple question: what’s the story? The best photo books—the ones your kids will ask for again and again—have a clear, simple narrative.
So, take a moment. Scroll through your camera roll, but this time, look for the connections. Don't just see a collection of random snapshots. See the clues. You’re like a detective, and your job is to piece together an adventure with your child as the hero.
This isn't about writing a novel. It's about capturing a feeling, a special day, or a tiny, precious moment. This is the step that turns a simple photo album into a treasured keepsake.
Brainstorming Your Story Theme
Every great story needs a focus. Trust me, trying to cram an entire year's worth of photos into one book is a recipe for overwhelm. Instead, zero in on a specific event or idea. It makes the whole process so much easier and the final story much stronger.
Here are a few themes I see parents use all the time, and they work beautifully:
The Big Adventure: This is perfect for a family vacation, a trip to the zoo, or even just a long walk in the woods. The story already has a built-in timeline, which makes it super easy to structure.
A Day in the Life: Don't underestimate the magic of the everyday! Photos from morning cuddles, messy mealtimes, and bath-time splashes tell a beautiful story about your child’s world right now.
My Favorite Things: Center the book around something your child is obsessed with—the family dog, visits with Grandma, or that impressive collection of toy dinosaurs.
Learning Something New: I love this one. Documenting the wobbly journey of learning to ride a bike, bake cookies, or build that first lopsided sandcastle makes for a powerful story of achievement.
A simple structure is your best friend. Seriously. Think: a clear beginning (getting ready for the park), a middle (playing on the swings), and an end (the sleepy, snack-filled ride home). This classic story arc is second nature to kids and makes it easy for them to follow along.
Outlining Your Simple Plot
Once you've landed on a theme, grab a piece of paper (or your phone's notes app) and sketch out a basic plot. Don't overthink it. Just list the main "scenes" of your story.
For example, a story about a trip to the apple orchard might look something like this:
The Beginning: All bundled up and getting in the car, so excited.
The Journey: Driving there, seeing the big red barn from the window.
The Middle: Picking the perfect apple and riding on the bumpy hayride.
The Climax: Taking a giant, crunchy bite of a juicy apple!
The End: Heading home, tired but happy with a big bag of apples.
This little outline is now your roadmap. When you go back to your photos, you’re not just aimlessly scrolling—you’re looking for a specific shot to match each part of your story. It makes finding the right pictures so much less daunting.
How to Choose and Prepare the Perfect Photos
The photos you choose are the heart and soul of your storybook. Think of yourself as a movie director, sifting through scenes to find the ones that make you feel something. You're not just picking pretty pictures; you're selecting images that carry emotion and push the story forward.
This is where the real magic begins. We’ve all got thousands of photos hiding on our phones, a far cry from the dusty photo albums of the past. It’s no wonder the photobook industry is booming—families are craving a way to turn that digital chaos into something meaningful. With over 5.3 billion internet users sharing photos online, creating a special, offline keepsake feels more important than ever.
What Makes a Photo "Storybook-Worthy"?
Not every photo is destined for a storybook page. You're hunting for pictures that are not just high-quality, but full of life. Look for clear subjects and expressive faces—that wide-eyed look of surprise or a huge, crinkle-nosed laugh can tell a whole chapter on its own.
Action shots are pure gold. A photo of your child mid-jump, focused on a wobbly tower of blocks, or carefully adding sprinkles is so much more engaging than a stiff, posed smile. These candid moments bring an energy to the page that makes the story feel real and alive.
A Quick Guide to Print-Ready Photos
Don't let the technical stuff intimidate you. Here’s all you really need to know: always use the original, high-resolution photo from your camera or phone. Photos you’ve saved from social media or received in a text message are almost always shrunk down and will look fuzzy when printed.
Pro Tip: Before you start building your book, run your favorite photos through a free AI photo enhancer. These tools can be lifesavers, sharpening blurry images and brightening up dark shots to make sure every picture looks its best.
Good lighting is just as crucial. Steer clear of photos that are too dark or where your child is a silhouette against a bright window. Natural light is your best friend, so prioritize pictures taken outdoors or near a window on a bright day. They’ll print with rich, true-to-life colors.
I put together this little checklist to help you quickly vet your photos.
Quick Photo Quality Checklist
Check | What to Look For | Why It Matters |
|---|---|---|
Resolution | Is it the original file? (Not from social media or a text message) | High-resolution files prevent blurry, pixelated printing. |
Focus | Is the main subject (your child) sharp and clear? | A crisp subject is essential for a professional-looking page. |
Lighting | Is the photo bright and evenly lit? Can you see their face clearly? | Good lighting ensures colors print vividly and details aren't lost in shadows. |
Expression | Does the photo capture a genuine emotion or action? | Expressive photos are the foundation of a compelling story. |
Running through this list will save you from the disappointment of a beautiful moment looking blurry in your finished book.
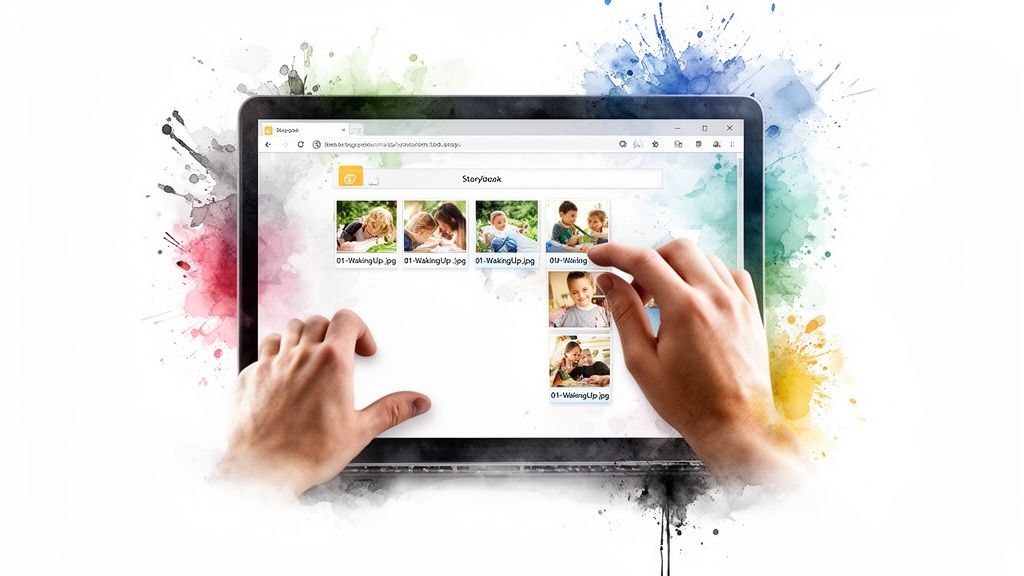
My Sanity-Saving Photo Organization System
Here’s the secret to a stress-free book-making experience: get organized before you start. Trust me, this little bit of prep work will save you a massive headache later on.
This is the simple, three-step system I swear by:
Create a Project Folder: On your computer, make one dedicated folder. Name it something clear, like "Liam's Zoo Adventure Book."
Gather Your Favorites: Go through your phone or camera roll and copy—don't move!—every photo you're considering for the story into this new folder.
Rename for a Story Flow: Once they’re all in one place, rename the files in the order they’ll appear in the book. Think
01-GettingReady.jpg,02-CarRide.jpg, and03-SeeingTheElephants.jpg.
When you finally upload your photos to the book builder, they'll already be in chronological order. It makes arranging your pages incredibly smooth and intuitive. If you feel like your entire digital photo library could use a refresh, we have a whole guide on how to organize family photos that you might find helpful.
Writing a Story Your Child Will Love
You’ve got your photos picked out and a rough idea of the story. Now for the fun part: adding the words that bring it all to life. Don't worry about being a perfect writer here. The goal is to connect the words to the feelings in your pictures, letting the text support the images, not overpower them.
Simple, direct language is your best friend, especially for toddlers and preschoolers. Think of the text as captions that add a little extra magic. You want your child to feel like you’re right there with them, reliving a favorite memory together.
Keep the Text Simple and Sweet
The best stories for young kids are often the most straightforward. You’re aiming for short, rhythmic sentences that are easy for little ears to follow. A great way to start is by just describing what’s happening in the photo.
Here are a few simple formulas I use all the time:
Name + Action: Start with your child’s name and say what they’re doing. Something like, "Here is Leo, splashing in the big, blue ocean!"
Sensory Details: Add words that bring sight, sound, or feeling into the story. Instead of, "You are eating a cookie," try, "You took a big, crunchy bite of that warm, chocolatey cookie."
Ask a Question: Pull your child into the story by asking simple questions. "Do you remember how cold the water felt?"
The real secret? Use their name often. Hearing their own name in a story is a powerful way to hold a young child’s attention and make the whole experience feel deeply personal. It instantly makes them the hero of their own adventure.
From Good to Great Captions
Let’s look at how a few small tweaks can completely change the feel of a page. A simple description is good, but adding a little emotion or detail makes it great.
Before:
You are on the swing.
After:
Up, up, up! Maya flies so high on the swing, laughing all the way to the sky!
See the difference? The second version adds action, emotion, and excitement. It transforms a simple observation into a vivid memory. This is a simple but incredibly effective technique when you create a book from photos.
Don’t stress about writing the perfect narrative from scratch. The photos have already done most of the storytelling for you. Your job is to simply add the words that name the feelings and highlight the fun.
Letting AI Help Craft Your Story
Sometimes, just staring at a blank page is the hardest part. This is where modern tools can be a huge help. Platforms like Once Upon A Memory Books use AI to give you a fantastic starting point. You provide the photo details, and the technology generates a polished narrative for you.
This isn’t about handing over control; it’s about collaboration. The AI gives you a first draft, which you can then edit and personalize. Tweak the wording, add inside jokes, and refine the tone until it sounds exactly like your family. It saves a ton of time while ensuring you have full creative control over the final story, making it truly yours.
Designing Your Book and Choosing Print Options
This is where the magic really starts to happen. You’ve gathered your photos and woven your words, and now you get to watch it all come together into a real, hold-in-your-hands book. The design choices you make here are what will transform your project from a folder of pictures into a polished, professional-looking keepsake.
It’s no surprise that families everywhere are turning digital snapshots into lasting treasures. The demand for premium hardcovers and lay-flat designs is booming, especially in North America and Europe, which just proves how much we all value these tangible memories. You can see the full trend in the latest photobooks market report.
Making Key Design Choices
The first few decisions you make will set the tone for the entire book. Don't let the options overwhelm you; just focus on what will work best for your story and, most importantly, for your child's little hands.
Book Size: An 8x8-inch square hardcover is a parent-favorite for a reason. It’s sturdy, easy for small hands to hold, and large enough to let your photos shine.
Paper Finish: You’ll usually see two main options: glossy or matte. I almost always recommend a matte finish for kids' books because it doesn't show fingerprints and cuts down on glare, making the pages easier to see from any angle.
Cover Style: A hardcover is the way to go for durability and that premium feel. A photo-wrapped cover, where your picture is printed right on the book, makes the story feel special from the very first glance.
If you’re creating a book for a toddler, you might want something even more indestructible. We have a whole guide on how to make your own board book for a truly drool-proof, tear-proof keepsake.
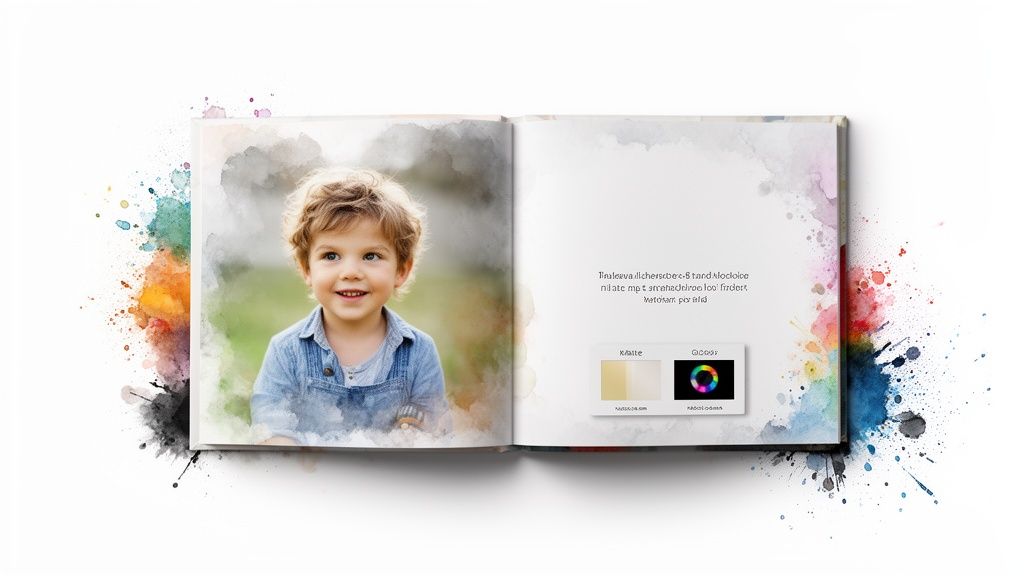
Simple Layouts for Maximum Impact
You don't need to be a graphic designer to create a beautiful book. The real secret is to give your photos room to breathe and let them do the storytelling.
Try to resist the temptation to cram too many photos onto a single page. Sometimes, one powerful photo filling the entire page can create a stunning "wow" moment. If you do want to use a few photos together, stick with simple, clean grids. This keeps the page from feeling cluttered or overwhelming to a young reader.
Don't underestimate the power of white space! The empty parts of a page are just as important as the photos. They give the eye a place to rest and draw even more attention to the images you want to highlight.
From Digital File to Delivered Book
Once you’ve put the finishing touches on your design, it’s time for the final, exciting step: ordering your book. Modern platforms have made this part incredibly simple.
At Once Upon A Memory Books, the production timeline is typically just 7–10 days from the moment you hit "order."
Just remember to factor in shipping time, especially if you need the book for a birthday, holiday, or another special occasion. With a little bit of planning, the process to create a book from photos is smooth, quick, and so incredibly rewarding when that package arrives at your door.
A Few Common Questions Answered
Even with your story mapped out and your favorite photos picked, a few questions always seem to pop up right when you sit down to build the book. That’s completely normal.
Let's walk through the most common ones I hear from parents. Getting these little details sorted out is the last step before the fun really begins.
How Many Photos Should I Use?
For a children's storybook, the sweet spot is usually somewhere between 15 and 25 photos. This is perfect for a standard 20- to 30-page book, giving you enough room for one great photo per page or a simple two-page spread.
More isn't always better. The goal is to keep the story moving without overwhelming a little reader. Instead of trying to cram in every single picture from an event, choose only the strongest images that push your story forward.
Let's say your story is "A Trip to the Zoo." A perfect set of photos would be:
One amazing shot of everyone arriving, full of excitement.
A few clear, expressive photos of the main animals you saw.
A final, happy-but-tired photo of leaving or the car ride home.
What’s the Best Way to Write for a Toddler?
Think simple, rhythmic, and repetitive. Short sentences are your best friend. Your main job is to name the people, places, and feelings your child sees in the pictures. A perfect line might be, "Here is Maya, smiling at the big, brown dog!"
Using your child’s name over and over is a fantastic little trick to keep them hooked. And don't be afraid to repeat a key phrase throughout the book, like "And what did we see next?" This turns reading into a fun, interactive game.
The words are just there to add a little magic to the pictures your child already loves. The simpler and more direct you are, the more your child will connect with the book and ask for it again and again.
Are My Photos Safe with an Online Service?
Yes, as long as you choose a service that takes privacy seriously. Companies like Once Upon A Memory Books are built by parents, for parents, so your privacy is our top priority.
Before you upload a single photo, look for a crystal-clear privacy policy that explains exactly how your photos are used and protected. Your images should only be used to create your book. If a service uses AI, the policy must state that your personal photos are never used to train public AI models. Stick with services that are transparent, use secure (HTTPS) connections, and give you total control over your family's memories.
Can I Edit an AI-Generated Story?
Of course. You should always have full control. Any quality service that uses AI to help write a story is just giving you a strong first draft, not a final, locked-in version. The best platforms, including ours, are designed for you to jump in and make it your own.
You should be able to tweak the text on every page, add your family’s inside jokes, or rewrite whole sections to better match your voice. The AI is a tool to save you time and spark some ideas, but the final story should always feel like it came from you.
Ready to turn your favorite memories into a story your child will cherish forever? At Once Upon A Memory Books, we make it easy to transform your photos into a beautifully printed, personalized storybook. Start creating your book today!


