Blog
Build Your Own Board Book A Guide for Lasting Memories
Want to build your own board book? This guide offers actionable tips on storytelling, design, materials, and printing to create a cherished family keepsake.

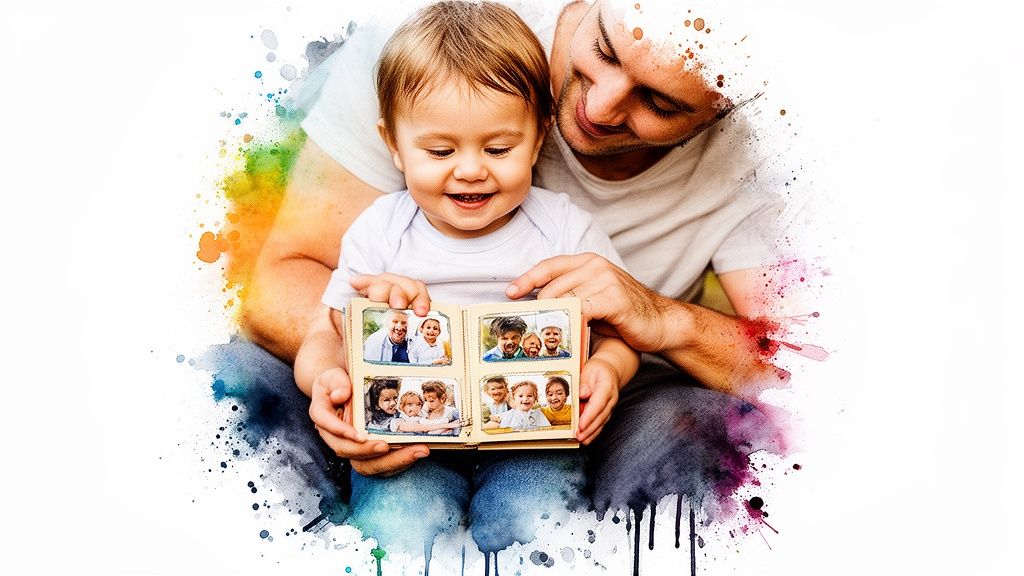
Imagine turning your child's favorite memories—that first trip to the zoo, a silly bedtime routine, a messy afternoon baking with Grandma—into a real book they can hold in their own two hands. When you build your own board book, you’re doing more than just a craft project. You’re turning those personal moments into a powerful way to connect, making your child the true hero of their own story.
Why Creating a Personal Board Book Matters
In a world filled with digital screens and mass-produced toys, there's something special about a gift that feels truly personal. A custom board book isn't just a collection of pictures; it’s a tangible piece of your family’s story, made just for its youngest member.
When a toddler sees their own face, their pet, or their grandparents looking back at them from the pages of a book, reading becomes an act of self-recognition. It’s a powerful experience that helps build their sense of identity and self-worth from an early age. It tells them, "Your life is important. Your story is worth telling."
A Lasting Keepsake and Powerful Learning Tool
Beyond the cuddles and emotional connection, these books are incredible tools for sparking early literacy. By using familiar words, faces, and places, you create a low-pressure, high-interest entry point into the world of reading. You’re not just teaching words; you’re building positive feelings about books that can last a lifetime. You can read more about how personalized story books for toddlers give them a head start in our detailed guide.
This desire for personalization isn't just a fleeting trend. It shows a real shift in how we think about gifts for our kids.
The market for personalized children's books is booming, projected to grow from $661.49 million in 2024 to $1,128.52 million by 2032. This isn’t just about numbers; it’s proof that parents are actively seeking gifts with deep personal value over generic, off-the-shelf options.
This trend highlights what so many of us already feel: custom-made items simply mean more.
Ultimately, a DIY board book is one of the most thoughtful and meaningful gifts for preschoolers you can give. It's a treasure that celebrates their unique world and family connections—a project that brings joy long after you’ve turned the final page.
Crafting a Story That Captivates Toddlers
Before a single drop of ink hits the page, the magic begins with your story. If you want to build your own board book that a toddler will actually grab over and over, you have to think like they do. Their world is small, immediate, and full of wonder. The best stories are the ones that reflect this reality.
Start by brainstorming simple, familiar concepts from their daily life. A trip to the grocery store, a playful afternoon with the dog, or a visit from Grandma are all fantastic starting points. These moments don't need wild plots; their power comes from being recognizable and emotionally resonant.
Structuring Your Simple Narrative
Even the simplest story feels more satisfying with a beginning, a middle, and an end. This basic structure guides your little reader through the narrative, making it easy to follow without getting lost. Don’t overthink it—this can be as straightforward as “getting ready,” “the adventure,” and “coming home.”
A story about a family beach day, for instance, could break down like this:
Beginning: Waking up, packing the car with buckets and towels, feeling excited.
Middle: Splashing in the waves, building a sandcastle, and eating a sandy sandwich.
End: Feeling tired and happy on the ride home, then falling asleep dreaming of the ocean.
This simple arc provides a sense of completion that’s incredibly satisfying for a young child. Each part of the story becomes a clear, digestible moment they can point to and connect with.
Writing for a Toddler’s Ears and Eyes
When it comes to the actual words, less is truly more. A toddler’s attention span is short, and their vocabulary is just starting to take off. Your goal is to create a rhythm they can feel and words they can understand.
Focus on simple sentences, rhythmic repetition, and familiar vocabulary. Using a recurring phrase like "Splash, splash, splash went the little feet!" creates a fun, predictable element that toddlers love to anticipate and join in on.
Remember, the words are there to support the visuals, not overpower them. Often, a single short sentence per page is more than enough to carry the story. Our guide on how to create a story with pictures offers more tips on striking this perfect balance.
To help you get it just right, here's a quick reference guide for tailoring your story's text and visuals to a toddler's developmental stage.
Age-Appropriate Content for Your Board Book
Age Group | Recommended Text Style | Visual Focus |
|---|---|---|
0-12 Months | Single words or very simple two-word phrases. Focus on sounds and labels. | High-contrast images, close-ups of faces, and familiar objects. |
12-24 Months | Short, simple sentences (3-5 words). Use repetition and rhythmic language. | Clear actions, expressive faces, and photos of family members or pets. |
24-36 Months | Slightly longer sentences (5-8 words). Introduce simple concepts like colors, counting, and feelings. | Simple narrative scenes, cause-and-effect visuals (e.g., building a block tower, then it falling). |
Think of this table as a starting point. You know your child best, so you can adjust the complexity to match their personal pace and interests.
Planning Your Visual Storytelling
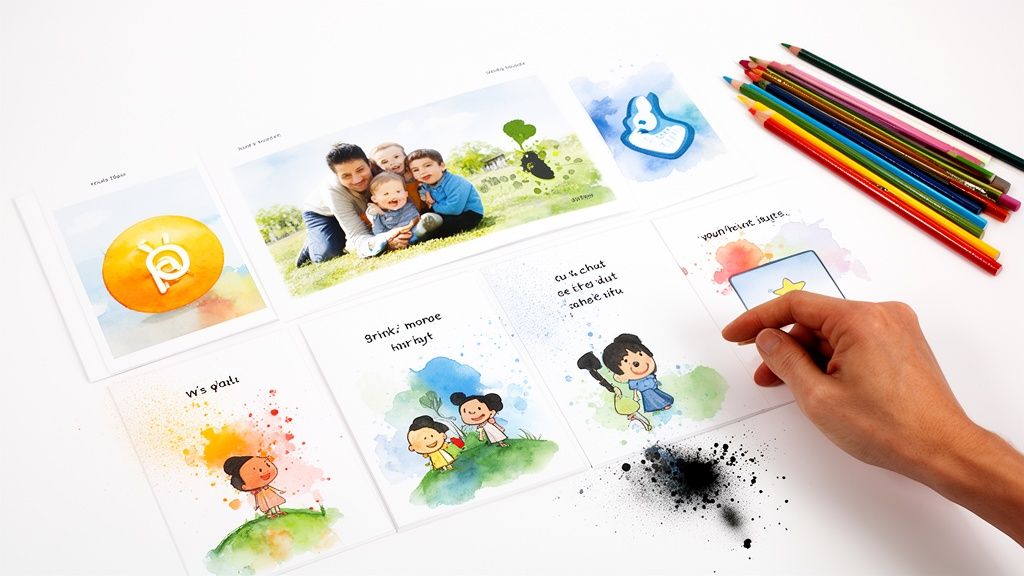
The visuals are the heart and soul of your board book. Whether you're using cherished family photos or your own illustrations, planning is key. The images must carry the narrative forward, clearly showing action and emotion.
When picking photos, always opt for high-resolution images where the subject is clear and expressive. A close-up of your child laughing is far more engaging than a distant, busy shot. Your visual story should be just as powerful as your written one, ensuring every page turn brings a new wave of delight and recognition.
Designing Pages for Little Eyes and Hands
This is where the magic really happens—where your words and pictures come together to create something truly special. When you build your own board book, the layout isn't just about making things look pretty. It’s about guiding your toddler's attention and making the story easy for their developing brain to follow.
The secret is to think from their perspective. For a toddler, simplicity and clarity are everything.
Think of each two-page spread as a single canvas. Your number one goal is to make the main subject pop right off the page. High-contrast colors are your best friend here, helping the important visuals stand out. Always place your text in clean, uncluttered spaces—like a patch of blue sky in a photo or a solid block of color in an illustration. Steer clear of busy patterns or complicated backgrounds that might distract from the hero of the page.
Creating a Simple Page Plan
Before you get too deep into the design, grab a piece of paper and sketch out a quick storyboard. I promise, this is a game-changer. It doesn’t need to be a masterpiece; simple stick figures and boxes are perfect. A storyboard is basically a mini-map of your book, showing you which picture goes on which page and where the text will live.
This simple step helps you see the book's rhythm. You can instantly spot if two facing pages feel disconnected, make sure the story flows naturally from one turn to the next, and check that you haven't forgotten a key moment. It’s the easiest way to catch design hiccups early, saving you a ton of frustration down the road.
A storyboard isn’t just about planning; it’s about ensuring each page turn feels like a natural, engaging reveal for your child. It helps you control the pacing and visual rhythm of the entire book.
Choosing Fonts and Enhancing Photos
Your font choice matters more than you might think. Go for large, clear, and simple typefaces. Sans-serif fonts like Arial, Helvetica, or Century Gothic are perfect because they don’t have the little decorative "feet" that can make letters tricky for brand-new readers. Make the text big enough for little eyes to easily track along with you.
If you’re using your own photos, a few small tweaks can make a huge difference. You don't need fancy software—most phones have built-in editing tools that let you:
Increase Brightness: Make sure you can clearly see faces and important details.
Boost Contrast: This helps the main person or object stand out from what’s behind them.
Enhance Saturation: A little boost makes colors more vibrant and exciting for kids.
Visuals are the heart of children's books today. The market for interactive and digitally-enhanced kids' books is booming, with forecasts showing an increase of $711.99 million between 2022 and 2027. This just proves how powerful strong, engaging images are for capturing a child's imagination. You can dig into more of these trends by checking out the growth of interactive children's books on Technavio.com. By focusing on clean, clear page design, you're using the exact same principles that make the very best children's books so unforgettable.
Choosing Your Creation Method: DIY vs. Professional
So, you’ve planned your story and have your images ready to go. Now comes a big decision in your quest to build your own board book: are you going to roll up your sleeves for a hands-on DIY project, or go with the polished finish of a professional printing service?
Honestly, there's no wrong answer here. The best choice really depends on what you're hoping for in terms of time, budget, and the final look and feel of your book.
The DIY route is a wonderfully rewarding craft project. It gives you absolute creative control and a personal touch that’s impossible to replicate. But it also means you’ll need to carefully choose your materials to make sure the final book is beautiful, durable, and—most importantly—safe for tiny hands and mouths. It's a journey that requires a bit of patience and precision.
The Hands-On DIY Path
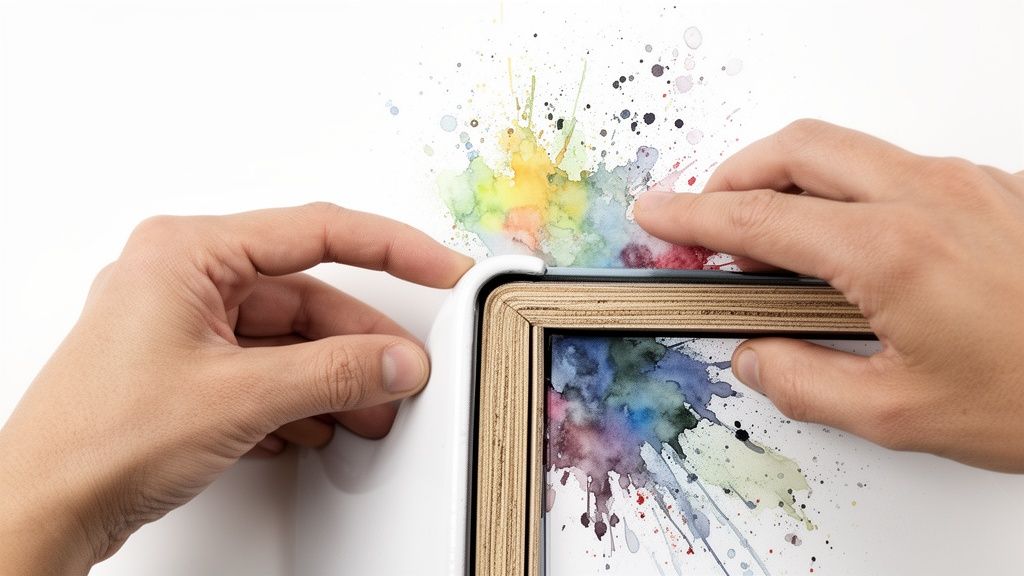
Choosing to make your book by hand basically turns you into an artisan. You'll need a few key supplies to get started. The foundation of any good board book is its pages, so you’ll want to find thick chipboard or glue together multiple layers of heavy cardstock.
The right adhesive is also critical for assembly. Look for a non-toxic, acid-free glue to bond the pages. To make your book drool-proof and tough enough for a toddler, you’ll also need a child-safe lamination or sealant. And don’t forget to round those corners for safety!
Binding is where it all comes together. Some common DIY methods include:
Book Rings: Simple and great for easy page-turning, but they can sometimes come apart.
Fabric or Duct Tape Binding: This creates a flexible spine that’s pretty sturdy, but it might wear down over time with lots of love.
Glued Spine: This gives you a more traditional, professional look, but it requires a careful hand to get a strong, lasting bond.
Each technique has its trade-offs when it comes to durability and toddler-friendliness. The main thing is to prioritize materials that can stand up to being chewed on, dropped, and flipped through a million times.
Opting for Professional Printing
If a bookstore-quality finish and maximum durability are what you’re after, a professional printing service is the way to go. This path swaps the hands-on crafting for a simple process where you just upload your digital files—your photos, illustrations, and text—and let the experts handle production. It’s a fantastic option if you're short on time or want a truly polished-looking keepsake or gift.
When you're ready to create your custom board book with a service, you’ll want to look closely at the specs they offer.
The biggest win with professional printing is getting access to high-quality, durable materials and binding methods made specifically for kids' products. This often includes certified non-toxic inks and ultra-thick pages that are nearly impossible for a toddler to tear.
Look for options like glossy or matte page finishes, different cover types (like padded or standard hardcover), and secure, professionally glued bindings. If you decide this is the best route for you, exploring professional book printing services can help bring your unique board book to life perfectly.
To help you weigh your options, here’s a quick comparison of the two approaches.
DIY vs. Professional Printing Comparison
Factor | DIY Method | Professional Service |
|---|---|---|
Cost | Generally lower upfront cost, but materials can add up. | Higher initial cost, but includes all materials and production. |
Time | Can be very time-consuming (sourcing, cutting, assembling). | Much faster. You just upload your files and wait for delivery. |
Quality | Charming and handmade, but quality depends on your skill. | Polished, bookstore-quality finish with professional binding. |
Durability | Varies based on materials; may not hold up to heavy wear. | Highly durable, designed to withstand toddlers. |
Customization | Full control over every detail, from size to texture. | Limited to the options offered by the service. |
Safety | Your responsibility to source non-toxic, child-safe materials. | Materials are typically certified non-toxic and child-safe. |
Ultimately, the right choice depends on what matters most to you. Do you want the heartfelt charm of a handmade gift, or the lasting quality of a professionally printed keepsake?
This whole decision-making process, from page layout to font and color choices, is really the core of your book's design.
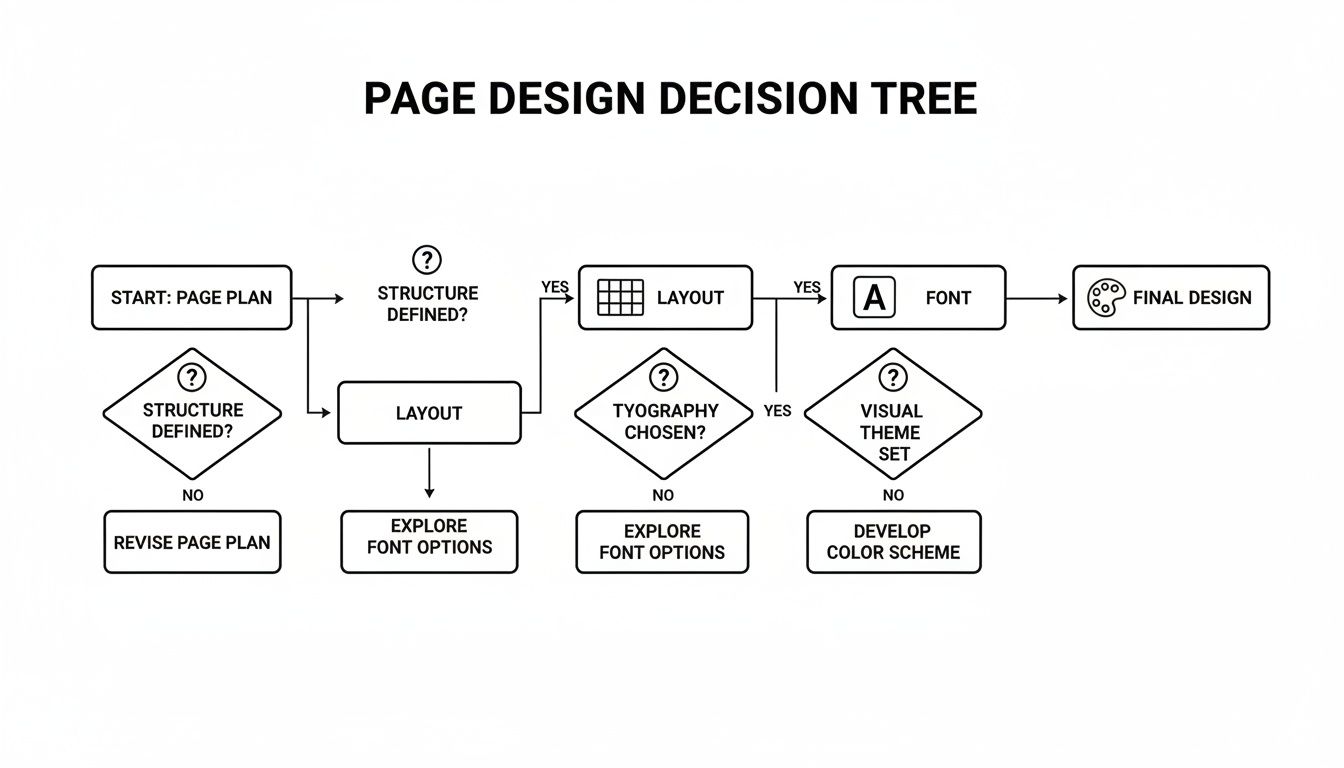
This flowchart breaks down that creative flow, showing how every element—the layout, font, and color—grows out of your initial page plan. In the end, whether you choose the intimate craft of DIY or the polished result of a professional service, you’re creating a treasure that puts your child right at the center of the story.
Ensuring Your Book is Safe and Durable
A board book’s life is tough. It’s destined to be chewed, dropped, and loved with an intensity that few other objects experience. This means when you build your own board book, your final checks for safety and durability are just as important as the story itself.
This isn’t just about making something that lasts; it’s about creating a keepsake that gives you complete peace of mind. Every material that goes into your book must be safe for a child who will inevitably explore it with their hands and mouth.
Prioritizing Non-Toxic Materials
For any DIY project, the rule is simple: if it isn't certified non-toxic, it doesn't belong in your book. This applies to every single component you use, from the glue to the final sealant.
Here’s a quick checklist of what to look for:
Adhesives: Choose a glue that is specifically labeled "non-toxic" and "acid-free." Standard craft glues often contain chemicals that aren't safe if ingested.
Inks and Prints: If you’re printing pages at home or at a local shop, just ask about their ink. Many modern printers use soy-based or other non-toxic inks, but it's always best to confirm.
Sealants: To make pages drool-proof, look for a water-based sealant or laminate that is certified as child-safe or food-grade. You'll want to avoid any varnishes with strong chemical smells.
These details are non-negotiable. They're what make a book both beautiful and completely safe for your little one.
Think of your material selection process as a safety audit. Every item must be approved for close contact with a child. This careful approach ensures your final creation is a source of joy, not worry.
Building a Book That Lasts
Durability is the other side of the coin. A flimsy book won't survive a single reading session with an enthusiastic toddler. Your construction choices are key to its longevity.
A major weak point in any book is its corners. Sharp corners are not only a poke hazard but also the first place to show wear and tear. Always use a corner rounder to give your pages smooth, durable edges that are gentle on small hands.
Reinforcing the spine is also critical. If you're using fabric or tape for a DIY binding, consider adding an extra layer of strong, flexible tape on the inside of the cover. For glued bindings, make sure you use a generous amount of adhesive and let it cure completely under pressure—like under a stack of heavy books—for at least 24 hours.
When using a professional printing service, look for their material specifications. Reputable companies will clearly state that they use child-safe inks and materials. They often offer ultra-thick, tear-resistant pages and durable bindings designed specifically to withstand the rigors of toddlerhood, taking the guesswork out of the safety equation for you.
So, you’re thinking about making your own board book. I get it! It's such a personal, heartfelt project, but it’s easy to get stuck on the details. When I made my first one, my head was spinning with questions.
Let's walk through some of the most common ones that come up. Think of this as a chat with a friend who’s been there, so you can move forward feeling confident and excited.
How Many Pages Should My Board Book Have?
My advice? Keep it short and sweet. Toddlers have the attention span of a goldfish cracker, so a long, winding story is a recipe for wiggles.
The sweet spot is usually between 10 and 20 pages. That works out to about 5 to 10 spreads (a spread is the two pages you see when a book is open). This is just enough room to tell a simple, satisfying story without losing your little one's focus. I try to stick to one clear idea or moment per spread, with just a simple sentence or two. It keeps the story moving and their little minds engaged.
What Is the Best Way to Write a Toddler Story?
Writing for a toddler is a completely different ballgame. Forget plot twists and complex characters. It all comes down to three things: rhythm, repetition, and relatability.
The story just needs to click with their world.
The real magic happens when you make the child the star of their own story. The moment they see themselves, their dog, or their favorite blue cup on the page, their little faces light up. That personal connection is everything.
Focus on these three things, and you can't go wrong:
Rhythm: Use simple, bouncy words. Read it out loud. Does it have a nice flow?
Repetition: Find a little phrase or sound you can repeat. My son loves anticipating the "Vroom! Vroom!" on the car page. It makes them part of the storytelling.
Relatability: Write about what they know. Bedtime, a trip to the park, snack time, a visit with Grandma—these are the epic adventures of their lives.
Can I Use Photos from My Smartphone?
Yes, absolutely! Today’s smartphone cameras are incredible. The camera itself isn't the issue; it’s all about the quality of the image file.
When you go to upload your photos or send them to a printer, always, always choose the "original" or "largest" file size. This gives the printer the most data to work with and keeps your pictures from looking blurry or pixelated. A little pro-tip: good, natural light is your best friend. A bright, clear photo taken by a window will always print better than a dark, grainy one.
What’s the Biggest Mistake to Avoid with a DIY Book?
If I could shout this from the rooftops, I would: don’t underestimate the need for durability.
The biggest mistake I see people make is using regular paper or flimsy craft glue. I promise you, that book will not survive its first toddler encounter. It’s just setting yourself up for torn pages and a whole lot of disappointment.
Your number one job is to use tough, toddler-proof materials. That means thick cardstock or chipboard for the pages. Just as important, make sure every single thing you use—the glue, the ink, any sealant—is certified non-toxic and child-safe. A beautiful book is wonderful, but a safe and sturdy one is non-negotiable.
Ready to turn those sweet memories into a book that will last? At Once Upon A Memory Books LLC, we handle all the tricky parts. You just upload your favorite photos, and we'll create a professionally printed, toddler-tough board book that puts your child right in the center of the story.


