Blog
How to Organize Family Photos and Reclaim Your Memories
Tired of digital clutter? Learn how to organize family photos with our practical guide. We'll show you how to gather, sort, and protect your precious memories.

Organizing your family photos comes down to a simple, four-part rhythm: gather everything in one spot, cull the duplicates and duds, organize it all with a clear system, and protect it with a solid backup. That’s it. This is how you turn digital chaos into a treasured, accessible archive of your family's story.
Feeling Buried in Digital Memories?

If you’re drowning in a sea of photos scattered across old phones, forgotten laptops, and random cloud accounts, I see you. The task feels monumental because, honestly, it often is. When digital cameras took over in the early 2000s, everything changed. Without the cost of film holding us back, we started snapping photos of everything, and our personal archives exploded almost overnight.
This photo explosion has left the average family trying to manage over 250,000 digital pictures. That sheer volume is why up to 70% of families admit they rarely even look at their own photos—the digital clutter is just too overwhelming to face. (Explore more insights on family photography trends on brittanyeitsertphotography.com).
But here’s a little mindset shift I want you to try: this isn’t just a chore. Organizing your family photos is one of the most rewarding projects you can ever do. It’s a true act of love—a way to preserve your family’s unique story for your kids, and their kids, to enjoy.
The Four Pillars of Photo Organization
To make this journey feel less like climbing a mountain, we’re going to break it down into four core pillars. Think of this as your roadmap, turning a huge, daunting task into a series of achievable steps. Each one builds on the last, creating a simple but powerful system that actually works.
Here’s a quick overview of the framework that will guide you from start to finish.
Pillar | Core Action | Why It Matters |
|---|---|---|
Gather | Bring every single photo into one central hub. | You can't organize what you can't find. This step ends the digital hide-and-seek. |
Cull | Delete duplicates, blurry shots, and near-identical pictures. | It reduces clutter and makes your collection focused on the best, most meaningful images. |
Organize | Create a simple, consistent folder and naming system. | A logical structure makes finding any photo—from any year—intuitive and fast. |
Protect | Set up an automated backup and syncing strategy. | This ensures your curated memories are safe from hardware failure, loss, or disaster. |
This structure gives you a clear path forward. You won’t get lost in the weeds because you’ll always know what to focus on next.
This four-pillar approach is what turns the overwhelming mess of photo management into a structured, manageable project. By focusing on one pillar at a time, you methodically build a photo library that is not only organized but also secure and genuinely enjoyable to browse through.
Creating Your Central Photo Hub
Before you can organize a single photo, you have to find them all. The very first step is to bring every last picture you own into one centralized place. It’s the only way to end the digital hide-and-seek game and make sure no memory gets left behind.
Think of yourself as a photo detective on a mission. Your job is to track down images from every corner of your digital and physical life. I once stumbled upon a forgotten folder from a decade-old family vacation on an ancient laptop I thought was completely dead. Finding it was like discovering a tiny, dusty treasure chest.
The Great Photo Roundup
Start by creating one master folder on your computer or an external hard drive. Call it something simple and obvious, like “PHOTOS – UNSORTED.” This is your digital inbox—a temporary holding pen for every image you unearth. Don’t worry about sorting or deleting just yet. The only goal here is to collect.
Make a checklist to guide your treasure hunt:
Current Devices: Your phone, tablet, and main computer are the low-hanging fruit. Start there.
Old Hardware: Time to dig out those old laptops, dusty desktop towers, and external hard drives from the back of the closet.
Legacy Media: Hunt down any old CDs, DVDs, or USB flash drives that might be hiding photos.
Cloud Storage: Check services like Dropbox, iCloud, and even old email accounts where you might have stashed pictures for safekeeping.
Social Media: Download your photo archives from platforms like Facebook and Instagram. Most services have a tool that lets you download all of your data in one big file.
This part can feel like a chore, but trust me, it’s the foundation for everything else. Every photo you rescue is another piece of your family’s story saved from being forgotten.
Choosing Your Hub: Physical Drive vs. Cloud Service
Once your digital inbox is set up, you need to decide where your permanent, organized photo library will live. This central hub is the single source of truth for your entire collection. You’ve basically got two main options, and each comes with its own set of pros and cons.
A physical external hard drive gives you complete control and privacy. Your photos are stored locally, right there in your home, with no monthly subscription fees. The downside? It’s vulnerable to physical damage, theft, or just plain hardware failure if it’s your only copy.
On the other hand, a dedicated cloud service like Google Photos, Amazon Photos, or iCloud offers automatic syncing across your devices, ridiculously powerful search features, and access from anywhere. That convenience usually comes with a subscription cost for any serious amount of storage, and you’re trusting a third-party company with your memories.
Honestly, a lot of people land on a hybrid approach that works beautifully—using a physical drive as the main archive (the vault!) and a cloud service for easy, everyday access and sharing. The right choice really comes down to your budget, how comfortable you are with technology, and how you actually plan to enjoy your photos.
Digitizing Your Physical Photo Collection
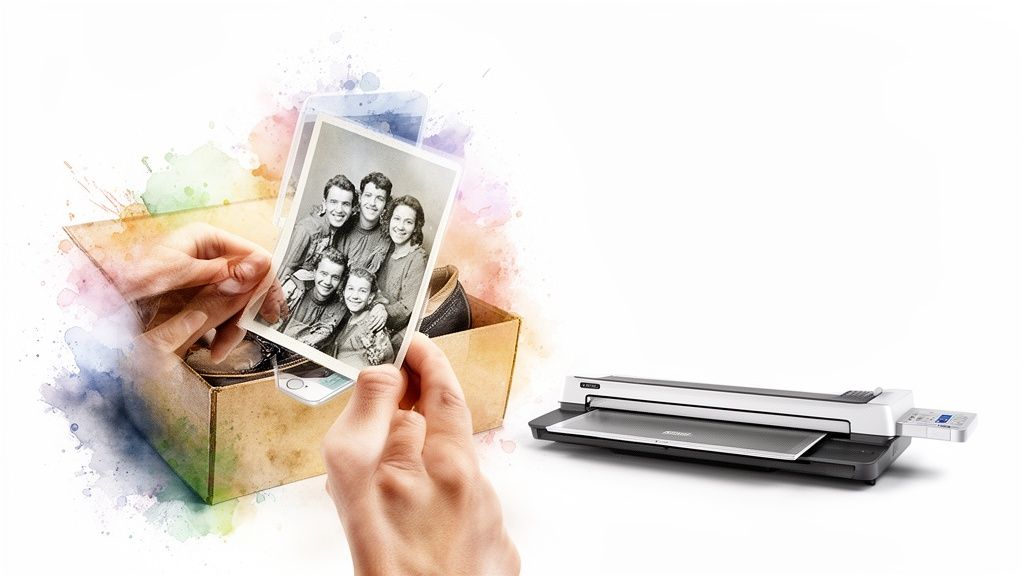
Those shoeboxes overflowing with faded prints and leather-bound albums from another era? They’re irreplaceable. Bringing these physical memories into your digital world is a powerful way to unify your entire family story.
This is the step that bridges the gap between your great-grandmother's wedding portrait and your child's latest smartphone snapshot. It’s all part of the same beautiful timeline.
But the key is to be thoughtful. Simply scanning thousands of photos without a plan just swaps one form of chaos for another. To do this right, you need a smart, integrated strategy.
Choosing Your Scanning Method
You’ve got a few solid options for turning prints into pixels, and your choice will come down to your budget, how much time you have, and the quality you’re aiming for.
Flatbed Scanners: This is your best bet for high-quality, archival-grade digital copies. A good flatbed scanner gives you control over resolution and color, which is perfect for precious or fragile heirloom photos that deserve a little extra care.
Mobile Scanning Apps: Apps like Google PhotoScan or Microsoft Lens use your phone’s camera to capture a surprisingly good digital image. They’re fantastic for quickly digitizing large batches of standard 4x6 prints when perfection isn't the primary goal.
Professional Scanning Services: If you have thousands of photos or just feel overwhelmed by the sheer volume, a professional service can be a lifesaver. Companies like Legacybox or even your local photo shop can handle the entire process for you, delivering organized digital files.
Think of it this way: the goal of digitizing is to create a versatile digital negative. A high-quality scan gives you the freedom to print beautiful enlargements, create custom keepsakes, and ensure the image survives for generations to come.
Scanning can feel like a massive undertaking, especially since the average family has around 10,000 prints to sort through. Starting with a high-resolution scan at 600 DPI is a fantastic benchmark. It preserves crucial details and can lead to 90% better print quality later on. This single step is vital for transforming overwhelming piles into an accessible timeline—a task that’s becoming more urgent as digital hoarding now affects over 60% of millennials inheriting their parents' photo collections, according to insights on chaostomememories.com.
Handling Your Photos with Care
When you’re working with older prints, a gentle touch is everything. Always handle photos by their edges to avoid leaving fingerprints or oils on the image surface.
Before scanning, use a soft, lint-free cloth to gently wipe away any dust. If you find photos stuck in old "magnetic" albums with those sticky pages, try using a piece of dental floss to carefully slide behind the photo. You can often lift it from the adhesive without tearing.
Once your physical prints are scanned, the real magic begins. You can seamlessly integrate these treasures into your digital library, using the same folder structures and naming conventions you've already set up.
A scanned photo of your grandparents' wedding in 1955 can now live right alongside your own wedding photos from last year, creating a rich, chronological family history. This unified collection becomes the perfect source material when you decide to create a custom book with photos, turning scattered moments into a beautiful, cohesive story.
The Art of Culling and Sorting Your Photos
Okay, you’ve gathered every photo into one digital hub. Now for the fun part. This is where you get to shift from archivist to storyteller, making choices about which memories truly define your family’s journey. It’s time to start culling and sorting—the art of clearing out the clutter to let the best moments shine.
I know, this step can feel a little ruthless at first. Emotions are tied to every picture. But trust me on this: the goal isn't to erase memories; it's to elevate the most important ones. Your future self will thank you for creating a collection that’s a joy to browse, not a chore to dig through.
The Culling Mindset: Be Decisive
Before you delete a single file, it helps to set some ground rules. Culling is about removing the noise so the signal—your most cherished moments—comes through loud and clear. Think of it like editing a movie; you only keep the scenes that move the story forward.
Start by making a few quick passes through your "UNSORTED" folder. Just look for the easy deletions. Don't overthink it.
Duplicates: Gone. You only need one copy of that photo your cousin texted you.
Blurry or Unfocused Shots: If it’s not clear, let it go. Unless it’s the only photo of a once-in-a-lifetime moment, a blurry picture is just digital clutter.
Near-Identical Bursts: We’ve all taken twenty photos to get that one perfect smile. Pick the best one—where everyone's eyes are open—and ditch the rest.
Unflattering Angles: Be kind to yourself and your family. If a photo makes someone feel self-conscious, it doesn’t need to live forever in your archive.
Culling isn’t about scarcity; it's about clarity. By removing the redundant and technically poor photos, you make space for the truly meaningful images to stand out. This single step can often reduce your photo volume by 30-50%.
Building Your Folder Structure
Once you’ve trimmed the fat, it’s time to build a simple framework for your photos. A straightforward, chronological folder system is the most intuitive and future-proof method I’ve found. It’s a system anyone in the family can understand at a glance, now and twenty years from now.
The most effective structure is simply Year > Month > Event Name. It’s clean, it’s scalable, and it makes finding anything incredibly easy.
For example, your folder tree would look something like this:
20232023-01 New Years Day2023-04 Easter Egg Hunt2023-07 Beach Vacation2023-10 Pumpkin Patch
20242024-02 Snow Day2024-05 Lilys Birthday
This approach keeps everything sorted chronologically by default. For those months without a big "event," a simple folder like 2024-03 Everyday Moments works perfectly.
Creating a Consistent File Naming Strategy
Renaming your files is the final polish that makes your collection truly searchable. A generic name like IMG_5821.JPG tells you nothing. A descriptive one tells you everything. The best formula I’ve found is YYYY-MM-DD_Event_###.jpg.
So, a photo from your beach trip might be named 2023-07-15_BeachVacation_001.jpg. This simple convention ensures that even if a photo gets moved or separated from its folder, its context is baked right into the filename. Don't worry, many programs can batch-rename files for you, so this isn’t nearly as tedious as it sounds.
While manual sorting is fantastic, the sheer volume of photos we take today has made AI-powered tools a huge help. It’s no surprise that AI face recognition is now part of over 60% of professional photo services. For families with tens of thousands of images, tools like Google Photos or Apple Photos can auto-tag faces with remarkable accuracy, identifying relatives across decades. It can cut the time you spend organizing from weeks down to a matter of hours. You can find more data on the family photography market on researchandmarkets.com.
Building a Bulletproof Backup Strategy
You've done the hard work of gathering, digitizing, and organizing your family's memories. Now for the final, most important step: protecting them. A beautifully organized photo library is priceless, but it's also fragile. A single hard drive crash or an accidental "delete all" could wipe it all away.
This is where a solid backup strategy becomes your family’s digital insurance policy.
The gold standard for keeping data safe is the 3-2-1 Backup Rule. It’s a simple but powerful framework used by pros, and it’s perfect for safeguarding your family photos. The idea is to create layers of protection so that no single point of failure can destroy your entire archive.
The 3-2-1 rule is beautifully simple:
Have three total copies of your photos.
Keep them on two different types of media.
Make sure one of those copies is located off-site.
This method covers you against just about any disaster. If your external drive fails, you have two other copies. If something happens to your home (fire, flood, theft), your off-site copy is safe and sound.
Choosing Your Backup Tools
To put the 3-2-1 rule into practice, you just need to combine a few different tools. The goal is to build a system that’s automated and resilient, one that works in the background so you don’t have to think about it.
Here’s a practical setup that works for most families:
Copy 1 (Your Primary Library): This is your main, organized collection of photos. Keep it on your computer’s internal drive or a primary external hard drive that you use regularly.
Copy 2 (Your Local Backup): Think of this as your immediate safety net. Set up an automatic backup to a second external hard drive. It's easy to do with built-in software like Time Machine for Mac or File History for Windows.
Copy 3 (Your Off-Site Backup): This is your ultimate protection. Use a "set-it-and-forget-it" cloud backup service. Services like Backblaze or Carbonite run quietly in the background, continuously uploading your files to a secure, remote server.
Of course, the whole point of a backup system is to protect a collection you truly love. It all starts with that first, simple decision: keep or delete?

This simple choice is the foundation of building an archive worth protecting.
Comparing Popular Photo Backup Solutions
Choosing the right mix of tools can feel overwhelming. Let's break down the most common options to help you find the right fit for your family and budget.
Backup Method | Best For | Pros | Cons |
|---|---|---|---|
External Hard Drive (EHD) | Quick, local backups and primary storage. | Fast transfer speeds, affordable one-time cost, you have physical control. | Vulnerable to local disasters (fire, theft), can fail, requires manual effort unless automated. |
Cloud Storage (e.g., Dropbox, Google Drive) | Syncing files across devices and sharing. | Easy access from anywhere, simple to share albums, good for your most-used photos. | Can get expensive for large libraries, not a true "backup" service (deletions can sync), privacy concerns. |
Cloud Backup (e.g., Backblaze, Carbonite) | "Set-it-and-forget-it" off-site protection. | Fully automated, unlimited storage for a flat fee, protects against local disasters. | Initial upload can be very slow, restoring large amounts of data takes time, recurring subscription cost. |
Network Attached Storage (NAS) | Tech-savvy users who want a private cloud. | You own the hardware, massive storage capacity, fast local access. | Higher upfront cost, requires some technical setup and maintenance. |
For most people, a combination of an External Hard Drive for local backups and a Cloud Backup service for off-site protection offers the best of both worlds.
As you consider your options, especially cloud services, it’s natural to wonder about privacy. It's smart to be informed about how different companies handle your data. If you're curious, you can read more about the realities of child photo privacy and AI myths to make choices you feel confident about.
Building this bulletproof backup strategy is the ultimate peace of mind. It ensures your family’s story is truly safe, ready to be enjoyed for generations to come.
Bringing Your Organized Photos Back to Life
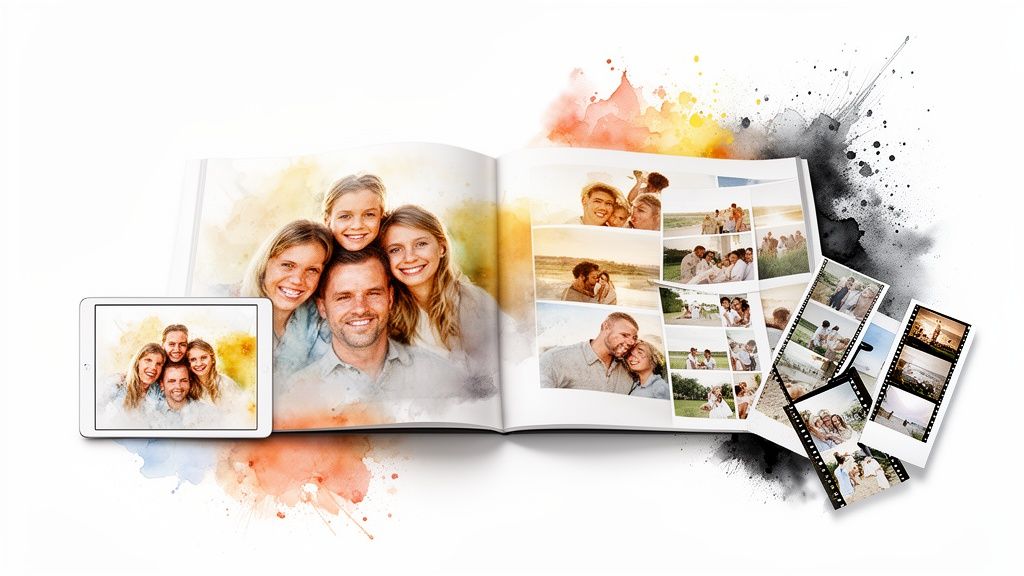
This is the best part. After all the sorting and scanning, the real magic isn’t just having tidy folders; it's the moment you actually start enjoying your photos again.
This is where all that hard work pays off. Your once-chaotic archive is now a creative playground, ready to bring your family’s story from a hard drive into your hands.
Create Meaningful Keepsakes
With every photo neatly sorted, finding the perfect images for a project is finally fun, not frustrating. The possibilities are endless, but here are a few ideas that families I’ve worked with absolutely love:
Design a "First Year" Photo Book: Effortlessly pull together the best shots from your baby's first 12 months for a beautiful, chronological story you’ll treasure forever.
Make an Anniversary Slideshow: Imagine surprising your parents by pulling photos from your clearly labeled "event" folders to create a touching slideshow for their big anniversary. No more frantic searching!
Print a Vacation Album: That last big family trip with hundreds of photos? Turn your favorites into a stunning coffee table book that you’ll actually flip through on a rainy Sunday.
Curate a Digital Photo Frame Playlist: I love this one. Create a "best of the decade" folder and load it onto a digital frame for a constantly refreshing display of your favorite moments.
These projects don’t just showcase your photos; they give them a new life. Creating personalized family picture books, for instance, transforms your digital files into a favorite bedtime story or a cherished keepsake for grandparents.
The real goal of photo organization is connection. It’s about making your family's story so accessible that it can be revisited, shared, and celebrated in new ways, strengthening the ties between generations.
Keep Your System Running Smoothly
So, how do you make sure you never have to tackle a massive organization project again? The final piece is a simple maintenance routine. This isn't another huge chore; it's a small, consistent habit that keeps your system clean and current.
Set aside just 15-20 minutes once a month. That’s it. During this time, your only tasks are to:
Import new photos from your phone and camera into that main "UNSORTED" folder.
Cull and sort these new images into your established folder structure.
Confirm your backup is running correctly. A quick glance is all it takes.
This small monthly commitment prevents the digital clutter from ever piling up again. It’s the secret to maintaining a photo library that is always organized, protected, and ready to be enjoyed.
Got Questions? You're Not Alone.
When you’re staring down a massive photo organization project, it’s completely normal for a few questions to pop up. Honestly, getting these cleared up is often the key to pushing past that initial overwhelm and actually getting started. Here are a few of the most common things I hear from families just like yours.
What Is The Best Software To Organize Family Photos?
I get this one a lot, and my answer is always the same: the best software is the one you’ll actually use. You don't need something complicated to get the job done.
For most people, a simple setup using your computer's built-in folders combined with a cloud service like Google Photos is perfect. It’s straightforward, easy to get the hang of, and simple to maintain over time.
Now, if you're a photo enthusiast who loves diving deep into editing and having precise control over metadata, then an industry powerhouse like Adobe Lightroom Classic is incredible.
But here’s the real secret: the tool you choose is far less important than the system you build around it. A logical folder structure and a consistent file naming strategy are the true foundation of an organized photo library, no matter what software you use.
How Long Is This Going To Take Me?
This really, really depends on the size of your collection. If you're dealing with a few thousand photos, you could probably knock it out over a focused weekend.
But if you’re looking at a collection of 100,000 photos or more, think of this as a marathon, not a sprint. The biggest mistake you can make is trying to do it all at once and burning yourself out.
Instead, start small. Seriously. Just tackle last year's photos first. It’ll give you a quick, satisfying win and build the momentum you need to take on the rest of your collection, one manageable chunk at a time.
Should I Bother With Tags and Keywords?
Absolutely—if you have the time and energy for it! Think of it this way: your folder structure is the sturdy skeleton of your library. Adding tags and keywords is what gives it superpowers, making your collection incredibly searchable.
You can add tags for just about anything, but I'd start with the basics:
People: Tagging names like "Grandma Jean" or "Uncle David."
Locations: Simple keywords like "Beach Trip" or "Disney World."
Events: Easy tags like "Christmas 2023," "Leo's 5th Birthday," or "Johnson Wedding."
You don’t have to tag every single photo right away. A great way to start is by tagging only your absolute favorite, five-star photos. This makes the process feel rewarding instead of like a chore.
Ready to turn those beautifully organized photos into a story your child will ask for again and again? At Once Upon A Memory Books LLC, we transform your family's real moments into beautiful, personalized storybooks. Start creating your custom memory book today!


