Blog
Making a Children's Book From Your Family Photos
Learn how making a children's book from family photos can create a cherished keepsake. This guide covers story ideas, photo selection, and printing options.
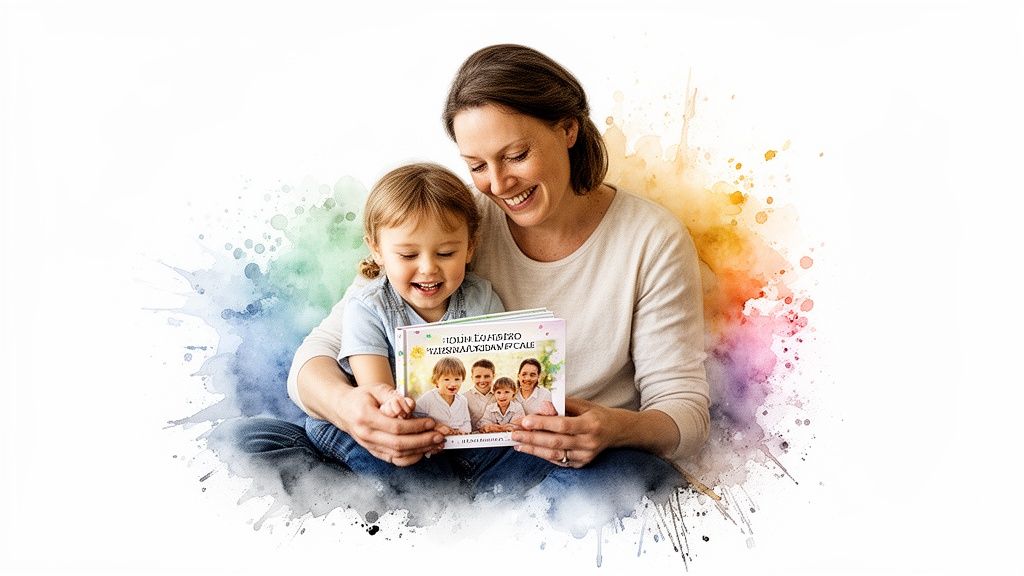
Imagine your child's face lighting up as they see themselves as the hero of their very own story. Suddenly, bedtime reading isn't just a routine—it's an adventure they star in. Making a children's book with your own family photos is one of the most powerful ways to create a keepsake that genuinely boosts their self-esteem and sparks a true love for reading.
Why Your Family's Story Matters More Than Any Other
In a world packed with wonderful children's books, nothing quite compares to the magic of one where your child is the main character. It transforms reading from a passive activity into an exciting experience of self-recognition. When kids see their own faces, their family, and their real-life experiences on the pages, it sends a profound message: Your story is important.
This isn't just about making a cute gift; it's a powerful tool for connection and development. These custom stories help reinforce family bonds and allow little ones to process big moments—from a first birthday party to a family vacation. The familiarity makes it incredibly engaging, holding their attention and strengthening those crucial early literacy skills.
The Rise of Personalized Storytelling
Parents are increasingly looking for unique, meaningful ways to capture childhood, and it shows. The personalized children's books market in the U.S. is on track to hit USD 1,128.52 million by 2032. This isn't just a fleeting trend; it’s a shift toward creating modern heirlooms that feel infinitely more special than something you can just grab off a shelf.
A personalized book is more than just a story; it's a tangible piece of your child's history, a celebration of their unique journey, and an heirloom that captures a fleeting moment in time. It turns "once upon a time" into "remember that time we..."
Creating a book like this can have a lasting impact on a child's confidence and sense of belonging. Here's a quick look at why it's so effective.
Why a Personalized Book Matters
Benefit | Impact on Child Development | Example in a Book |
|---|---|---|
Boosts Self-Esteem | Seeing themselves as the hero reinforces their importance and value. | "And then, [Child's Name] bravely led the way through the tall grass!" |
Strengthens Family Bonds | Reinforces memories and connections with loved ones. | A page showing the child being hugged by Grandma and Grandpa. |
Improves Literacy Skills | Familiar faces and events make reading more engaging and accessible. | Simple sentences describing a photo of them playing at the park. |
Aids Emotional Processing | Helps children understand and talk about major life events. | A story about moving to a new house, showing their old room and new room. |
A custom book doesn't just tell a story; it validates a child's life and experiences in a way nothing else can.
From Photo Album to Cherished Narrative
The idea of turning a folder of digital photos into a real story might sound like a lot of work, but you're really just finding the narrative that's already there. You’re not just archiving pictures; you’re curating a legacy. It's a beautiful way to preserve the small, everyday moments that truly define a childhood.
If you need a little help getting organized, a family history book template can be a great starting point for structuring your memories.
Thankfully, you don’t have to be a professional writer or designer to do this anymore. Modern tools and AI-powered services make the process surprisingly simple, even for the busiest parents. They can help weave your photos and memories into a beautiful, polished story. To see how easy it can be, you can explore our guide on creating family picture books.
How to Create a Story That Captivates Your Child
The very best stories for young kids almost always spring from the simplest, most familiar moments. The magic of making a children's book from your own life is that the raw material is already there, waiting in your camera roll and your memory.
You don't need a far-fetched fantasy plot. You just need the everyday adventure of a trip to the zoo, a visit with grandparents, or the cozy drama of a rainy afternoon spent indoors. Start by looking through your photos and picking a single, memorable event. A birthday party, a holiday gathering, or even just a messy afternoon baking cookies can become an epic tale from a child's perspective.
Finding Your Story's Heartbeat
Every compelling children's story, no matter how simple, needs a clear structure. I like to think of it as a journey with a takeoff, a flight, and a landing. This basic framework helps toddlers and preschoolers follow along without getting lost or bored.
The Beginning: Introduce the star of the show (your child!) and the setting. What was the special occasion or activity? For example: "One sunny morning, Maya woke up with a happy wiggle. Today was her fourth birthday, and a big party was waiting!"
The Middle: This is where the action happens. Describe a sequence of events, a small challenge, or a funny surprise. What did they see, do, or feel? You could write: "First, she played tag with her cousins in the yard. Then, it was time for cake! But when Daddy brought it out, one candle was missing!"
The End: This is where you resolve the action from the middle and bring the story to a comforting close. The missing candle is found, the cake is eaten, and the day ends happily. Something like: "Suddenly, Maya's puppy, Pip, trotted over with the candle in his mouth! Everyone laughed, sang 'Happy Birthday,' and Maya made a giant wish."
This simple arc gives the story a satisfying rhythm that young children instinctively understand and love.
Using Language That Little Ears Love
The way you tell the story is just as important as what happens in it. For toddlers and preschoolers, the sound and feel of the words are everything. Your goal should be simple, direct language that feels warm and personal.
One of the most powerful tools in your toolbox is repetition. Repeating a key phrase or sound creates a predictable pattern that kids adore anticipating. For instance, if the story is about a trip to the farm, you might repeat, "And what did Leo see next?" on every page.
Also, don't forget to bring the story to life with sensory details. Instead of just saying the cake was good, describe the "squishy pink frosting" and the "yummy chocolate smell." These details pull your child right back into the memory, making the story feel vivid and real.
A great story for a young child doesn't need complex vocabulary or an intricate plot. It needs rhythm, familiarity, and a sense of wonder. It should feel like a warm hug in word form, reassuring them that their world is exciting, safe, and full of love.
Letting AI Be Your Co-Writer
Feeling a little unsure about your writing skills? That’s a super common hurdle, but modern tools have made it easier than ever to get started. Many personalized book services now use AI to help you craft a polished, beautiful narrative.
It's simple: you provide a few key details from your memory—the who, what, and where of your chosen event—and the AI generates a draft for you. It can turn your bullet points about a beach trip into a flowing, age-appropriate story in seconds.
The best part is that you're always in full creative control. You can edit the text, add inside jokes, or tweak sentences to perfectly match your family's unique voice. It’s like having a helpful co-writer who does the heavy lifting, letting you focus on the heart and personalization that only you can bring.
For more inspiration on combining words and images, you can learn more about how to create a story with pictures in our related guide.
Selecting Photos That Tell Your Story Visually
Once you have the words for your story, it’s time for the fun part: finding the perfect photos. Think of your camera roll as a treasure chest. The pictures you choose are more than just decoration; they’re the visual heartbeat of your book. They pull your child right into the moment and make the whole thing feel real.
The secret is to pick photos that don’t just show what happened, but how it felt.
Think Like a Storyteller, Not Just a Photographer
Start by hunting for pictures that are clear, bright, and full of life. A technically perfect photo is nice, but it’s nothing compared to one that captures a genuine, unfiltered emotion.
That slightly blurry picture of your toddler dissolving into giggles? That’s gold. It’s far more powerful than a perfectly posed, stiff smile. Look for the action shots: the determined focus while stacking blocks, the wide-eyed wonder at seeing a ladybug, or the pure, unadulterated joy of running through a sprinkler. These are the moments that make a story come alive.
Give Your Words Some Breathing Room
Now, put on your designer hat for a minute. Not every gorgeous photo works well on a book page. The best images for storybooks often have what designers call "negative space." This is simply the area around your child—a patch of clear sky, a plain wall, or a stretch of green grass.
Why does this matter? Because that’s where your words will go. A photo that’s too busy or cluttered can make the text nearly impossible to read, which is frustrating for little learners. You want the page to feel calm and inviting, not chaotic.
Here’s a great example from Once Upon A Memory Books showing how this works in practice.
See how the text and illustrations have plenty of room? The page feels balanced and easy to look at, letting both the photo and the story shine.
A Quick Tech Check for Beautiful Printing
While emotion is king, a little technical quality check will ensure your printed book looks stunning. A photo that looks great on your tiny phone screen can sometimes turn out pixelated or blurry in print.
Here are a few simple things to look for:
Go for High Resolution: Always use the original files from your phone or camera. Avoid screenshots or images you’ve saved from social media, as they are often compressed and lose quality. Most modern smartphone photos are more than good enough if you use the original.
Find the Good Light: Pick photos that are well-lit, especially with natural light. Pictures taken in dimly lit rooms can look grainy on a printed page. Try to avoid harsh shadows across faces, too.
Keep it in Focus: Make sure the most important thing—your child—is in sharp focus. It’s totally fine if the background is a little blurry; in fact, that can help your child stand out. But their sweet face should be crisp and clear.
Remember, you're building a visual narrative. Each photo should match a specific moment or sentence in your story. Try laying them out in order to see how the visual story flows from one page to the next.
Create a Cohesive Vibe
Your final collection of photos should feel like they belong together. Even if they were taken at different times or in different places, you can aim for a consistent feel. Maybe it’s a similar color palette (think warm, sunny photos for a summer story) or a consistent emotional tone.
To get there, pull way more photos than you think you'll need. If your book will have 12 pages, try to find at least 20-25 potential images. This gives you the freedom to swap pictures in and out as you match them perfectly to your text.
Think about the rhythm of your story, too. You might use a big, full-page, high-action photo for the story’s climax, followed by a smaller, quieter image for the gentle conclusion. A huge photo of your child blowing out their birthday candles, for example, could be followed by a cozy little picture of them asleep, dreaming sweet birthday dreams. This kind of variation keeps the book visually exciting and helps guide your child through the story’s emotional journey.
Designing Your Book’s Layout and Illustrations
This is where the magic happens—the moment your story and photos start to feel like a real book. How you decide to bring your words to life visually is one of the most exciting parts of the process. You’ve really got two main paths: turning your family photos into charming illustrations or working directly with an artist.
A fantastic option that’s become popular with parents is using AI-powered services. These tools can take your actual photos and reimagine them in sweet, storybook styles. The best part? They keep the likeness of your child and family, just with an artistic flair. It’s often a quick and budget-friendly way to get a polished look without the long wait.
The other route is to collaborate with a freelance illustrator for a completely custom feel. This gives you total creative control to build a visual world from the ground up. Just keep in mind that this path requires a much bigger budget and a longer timeline, often stretching over weeks or even months.
Choosing Your Visual Style
The choice between AI illustrations and a hired artist usually boils down to three things: your budget, your timeline, and the look you’re dreaming of.
AI-Assisted Illustrations: Perfect if you want to see your family’s recognizable faces in the book. It’s a fast, affordable way to get a consistent, artistic style from cover to cover.
Hiring an Illustrator: The best choice for creating a totally unique, imaginative world. Go this route if you have a very specific artistic vision and a flexible budget and schedule.
For most families making a personal keepsake, AI tools strike the perfect balance between personalization and a professional finish, turning everyday snapshots into something truly special.
This little guide breaks down what to look for when you're choosing the photos that will become your illustrations.
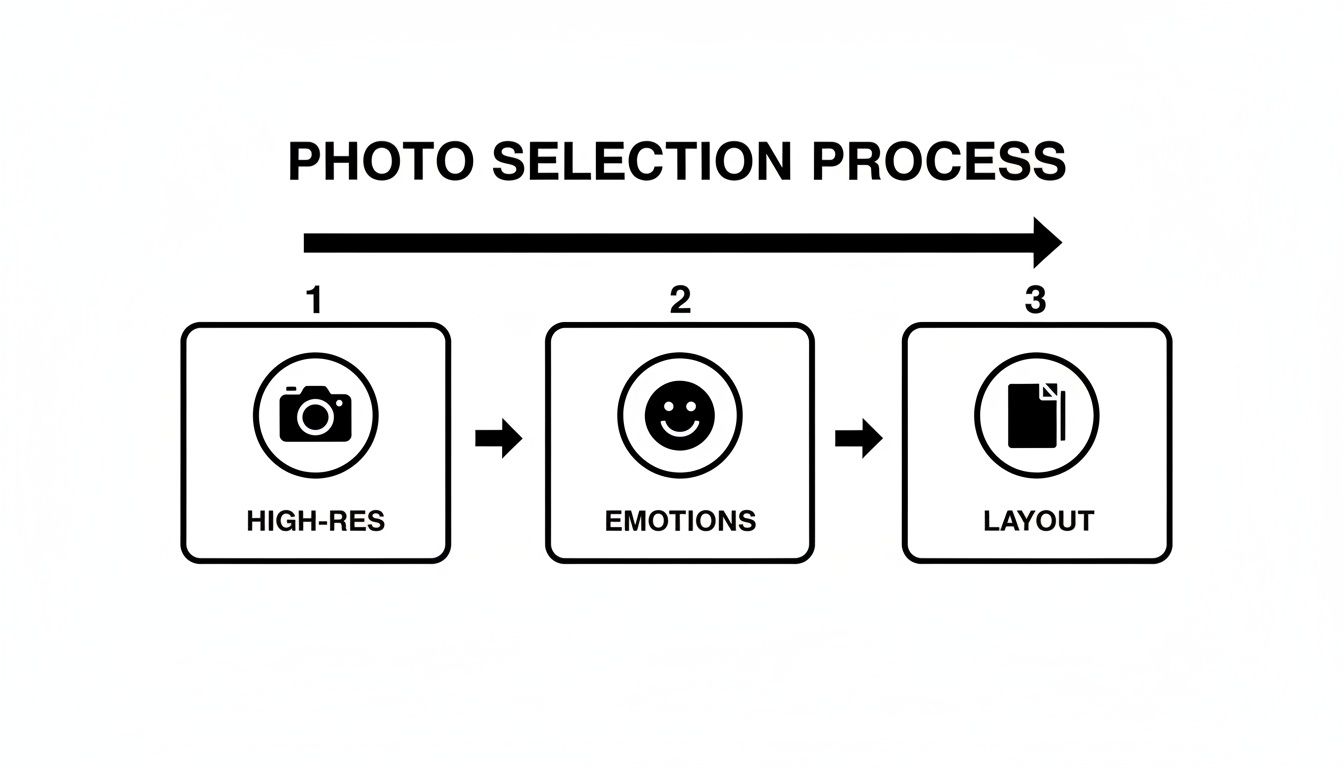
Following these steps ensures every photo you pick is not only high-quality but also full of emotion and ready to fit beautifully into a book layout. It’s the foundation for great illustrations.
The Fundamentals of Page Design
Once you’ve settled on your visual style, it’s time to arrange everything on the page. Good page design should feel invisible—it guides your little one’s eyes across the page and makes the story flow naturally.
One of the biggest keys is to vary your layouts. Try to avoid placing the text and images in the exact same spot on every single page. That kind of predictability can get a little boring for a toddler. Mix it up! Some pages could have a big, beautiful image that bleeds to the edge with text on top, while others might feature a smaller picture on one side with the words on the other. This keeps things dynamic and makes turning the page exciting.
Beyond just making things pretty, mastering book design and layout is what separates a simple photo album from a polished, professional-feeling children's book.
Balancing Images and Text for Little Readers
The relationship between your words and pictures is a delicate dance. They need to support each other without getting in the way. A classic mistake is placing dark text over a busy, dark part of a photo, which makes it almost impossible for a child to read.
Always hunt for “negative space” in your pictures—places like a clear blue sky, a plain wall, or a patch of green grass. These spots are perfect for text. If a photo is just too vibrant and detailed, consider placing the text on a clean white background on the facing page instead. The goal is for the words to feel like they belong.
The best page layouts feel spacious and inviting. They give a child's eyes room to explore the illustration and then comfortably settle on the words, making reading a seamless, joyful experience.
Selecting Child-Friendly Fonts
The font you choose plays a surprisingly big role. It needs to be incredibly clear and easy for developing eyes to read. I always tell people to steer clear of fancy script or overly decorative fonts, as they can be really tough for young readers to figure out.
Look for fonts that have:
Simple, clean letterforms that are easy to recognize.
Generous spacing between letters and words.
A friendly, rounded feel rather than sharp, formal edges.
Classic, friendly sans-serif fonts are almost always a winning choice. The right font makes the story feel accessible and fun, which is exactly what you want for a positive early reading experience.
Bringing Your Book to Life: The Final Touches
You’ve poured so much love into the story and the art. Now for the final, exciting part: turning your creation into a beautiful, physical book that’s ready for countless story times. Before you hit that final "approve" button, there's one step that's absolutely essential: proofreading.
Trust me, even after you’ve read the story a hundred times, tiny typos and grammatical hiccups can still hide in plain sight. Your brain knows what it meant to say and often skips right over small errors. This is where a fresh pair of eyes is your best friend. Ask your partner, a friend, or a family member to read through it—they'll almost always catch something you missed.
Here’s my favorite trick: read the entire story out loud. Seriously. It feels a bit silly at first, but it forces you to slow down. Awkward sentences and clunky phrases that look perfectly fine on screen suddenly sound clunky when you speak them. It’s the quickest way to find and fix the rhythm of your text.
Choosing a Format Built for Little Hands
The physical feel of your book is just as important as what's inside, especially when your audience includes an enthusiastic (and sometimes destructive) toddler. This isn't just a book; it's a toy, a teething ring, and a treasured friend. You need something that can handle being dropped, chewed on, and loved with gusto.
Hardcover: This is the gold standard for a reason. A sturdy, case-bound hardcover protects the pages and gives the book a premium, timeless feel. It’s built to last for years, making it the perfect choice for a keepsake you want to pass down.
Softcover: While more budget-friendly, softcover books are prone to bent corners, creases, and general wear and tear. They’re fine for a quick, temporary project, but they just don't have that heirloom quality a special book deserves.
For a book made for toddlers and preschoolers, a durable hardcover is almost always the right call. It sends a message that this isn't just any book—it's a treasure.
Why Size and Paper Make a Difference
For little readers, the classic 8x8-inch square format is a fantastic choice. It’s large enough for the illustrations to feel big and immersive on a little lap, but it’s still small enough for tiny hands to hold and turn the pages themselves.
The paper quality also plays a huge role in the book's longevity and feel. Most personalized book services use a high-quality lustre-finish paper. This gives the pages a subtle sheen that makes colors pop without any harsh glare, and it’s thick enough to resist easy rips and tears. It's a world away from the thin, flimsy pages in mass-market paperbacks. For the youngest crowd, you can even find services that create custom board books with ultra-thick, chew-proof pages.
The goal is to create a full sensory experience. A well-made book with thick, smooth pages and a solid cover feels important in a child’s hands. It encourages them to treat it with care and see it as something truly special.
A Quick Look at Timelines and Costs
So, how long does this final step take? Once your design is locked in and approved, the process is pretty quick. Most high-quality print-on-demand services take about 7-10 business days for production and shipping. It’s always smart to plan ahead, especially if you’re making the book for a birthday, holiday, or another special date.
When it comes to cost, a custom, hardcover children's book usually lands somewhere between $30 and $60 if you're using an all-in-one platform. Honestly, this is an incredible value when you consider the alternative. Hiring a writer, illustrator, and designer separately could easily run you hundreds, if not thousands, of dollars.
A Quick Note on Photo Privacy and Safety
It’s completely normal to pause before uploading precious family photos to a website. As a parent, I get it. Reputable companies are always upfront about how they handle your images. Before you start creating, take a moment to find the privacy policy on their website.
Look for clear language stating that your photos will only be used to create your book and won't be shared or used for anything else. A trustworthy platform will have secure upload portals and clear data policies designed to protect your family’s memories. This final check gives you the peace of mind to finish your beautiful, personal project with confidence.
Making Your Book a Cherished Family Ritual
The real magic of making a children's book starts the moment it arrives. This isn't just a finished project; it's the beginning of a new family tradition. The book's true power unfolds in how you weave it into the fabric of your daily life, turning it from a beautiful object into a cherished ritual.
There's something uniquely powerful about a book that validates your child's own life. When they see their world reflected on the pages, it reinforces their sense of belonging and self-worth. By making it a regular part of your routine, you're sending a clear message: their story matters.
Weaving Your Book into Everyday Moments
You don’t need a grand plan to make this book a part of your family’s rhythm. It’s all about creating small, intentional moments for connection. Think beyond just sticking it on the shelf and find simple ways to bring it to life.
Here are a few ideas I love:
Make it the Bedtime Finale: End your nightly reading session with their own story. The familiar faces and narrative provide a comforting, secure way to wind down and ease the transition to sleep. It’s the perfect hug in book form.
Use it as a Milestone Marker: Is your little one nervous about preschool? A book about their classroom and friends can turn anxiety into excitement. Welcoming a new sibling? A story that makes them the proud older brother or sister can help them feel included and special.
Start an Annual Tradition: Imagine a shelf filled with a new book for every year of your child’s life. Creating an annual “Year in Review” becomes a tradition in itself—a tangible, page-by-page timeline of their growth that you can revisit together.
The best family rituals are often the simplest. It’s not about elaborate ceremonies, but the consistent, quiet moments of shared attention that build a foundation of love and security. Your book is a perfect tool for creating exactly that.
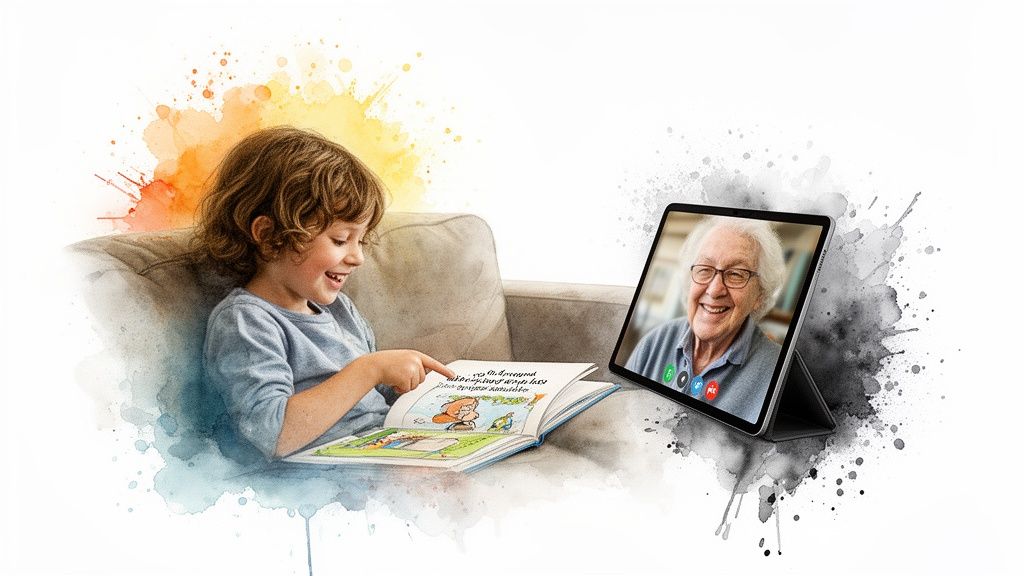
Connecting Across the Miles
This little book is also a powerful bridge to family who live far away. It’s one thing to say hello on a video call; it’s another for a grandparent to read a story about their grandchild, to their grandchild. It makes the connection feel so much more intimate and personal.
These shared readings do more than just entertain. The photos spark real conversations and trigger memories, strengthening those bonds across generations. The book becomes a script for connection, ensuring every call is filled with personal, heartfelt interaction.
Ultimately, this is more than just reading a story. It’s about reinforcing your child's place at the very center of their own beautiful narrative. Each time you open the cover, you're creating a moment of connection and celebrating the unique story that only your family can tell.
Your Questions, Answered
Thinking about creating a personalized book? It's a wonderful idea, but it's natural to have a few questions before you dive in. Here are some of the most common things parents ask us, with straight-from-the-heart answers.
How Long Does This Actually Take?
This is the big one, isn't it? We're all short on time.
If you use an AI-powered service like Once Upon A Memory Books LLC, you can honestly go from idea to "order placed" in under an hour—sometimes in just a few minutes. From there, you'll want to factor in about 7-10 business days for printing and shipping.
Now, if you go the traditional route and hire a freelance illustrator or designer, you're looking at a much longer timeline. That creative process, with all the back-and-forth, can easily stretch into several weeks or even a few months before the book is even ready to print.
Do I Need to Be a "Creative" Person for This to Work?
Absolutely not. Let that worry go right now. Modern tools are built for busy parents, not professional artists or authors.
The AI does the heavy lifting—it can spin a sweet, simple story from a few of your memories and even create illustrations based on the photos you upload. Your job is the most important one: to provide the heart. You bring the personal details that make the story uniquely yours. No writing or art degree required, I promise.
Is It Safe to Upload My Child's Photos Online?
As a parent, this is probably my number one concern with anything online. It's a question we take incredibly seriously.
Reputable companies will always put your family's privacy first. Before you upload a single photo, scroll down to the website's footer and find their privacy policy. It should state clearly and simply that your photos are only used to create your book—and nothing else.
A quick check for things like secure, encrypted uploads and transparency about data is all it takes. It’s a small step that gives you complete peace of mind while you're creating a family treasure.
What's a Custom Children's Book Going to Cost Me?
The cost can vary wildly depending on how you make it. If you hire a writer and an illustrator separately, you could easily spend hundreds, if not thousands, of dollars. It's a beautiful but often pricey process.
Thankfully, all-in-one services that use AI have made this so much more affordable. For a high-quality, personalized hardcover book, you can typically expect to pay somewhere between $30 and $60. It makes a truly one-of-a-kind keepsake an accessible gift for most families.
Ready to turn those sweet memories into a story they'll ask for again and again? With Once Upon A Memory Books LLC, you can create a beautiful, custom hardcover book in minutes. Start creating your personalized children's book today.


