Blog
Make Your Own board book make your own: A Guide to Creating a Cherished Keepsake
Learn how to create a board book make your own. Turn family memories into a durable keepsake your child will treasure.
There’s something truly magical about turning your family photos into a durable little story your child can actually hold. You can go the crafty route with a full-on DIY approach, or you can order a beautifully polished, professionally printed book from a service designed for exactly this. Either way, you’re creating a one-of-a-kind keepsake that helps build a love for reading from day one.
The Magic of Making Your Own Board Book
When you decide to board book make your own, you’re not just gluing pictures onto cardboard; you’re building a bridge. It’s a tool for bonding over bedtime stories, a boost for early literacy skills, and a sweet way to freeze your favorite memories in time. A book filled with familiar faces and shared adventures quickly becomes a treasured part of your family’s rhythm.
It’s no surprise that these sturdy, chew-proof books are becoming more and more popular. The global children's picture book market is expected to jump from $12.34 billion in 2025 to a massive $21.68 billion by 2034. It just goes to show how much parents and grandparents value these tangible keepsakes.
Choosing Your Creative Path
So, where do you start? The very first decision is how you want to bring this book to life. Are you ready to roll up your sleeves for a hands-on craft project, or would you prefer the clean, polished finish of a professional service? Your answer really depends on what you're looking for, how much time you have, and the final look you want.
The DIY Approach: This is perfect if you love crafting and want something with a truly handmade, one-of-a-kind feel. You get total control over every single detail—every cut, every pasted picture, every word.
The Professional Service: If you're a busy parent looking for a high-quality, durable, and child-safe book that looks like it belongs on a bookstore shelf, this is your best bet. It’s a huge time-saver and delivers a beautiful, long-lasting keepsake.
This little flowchart breaks down the two main paths you can take.
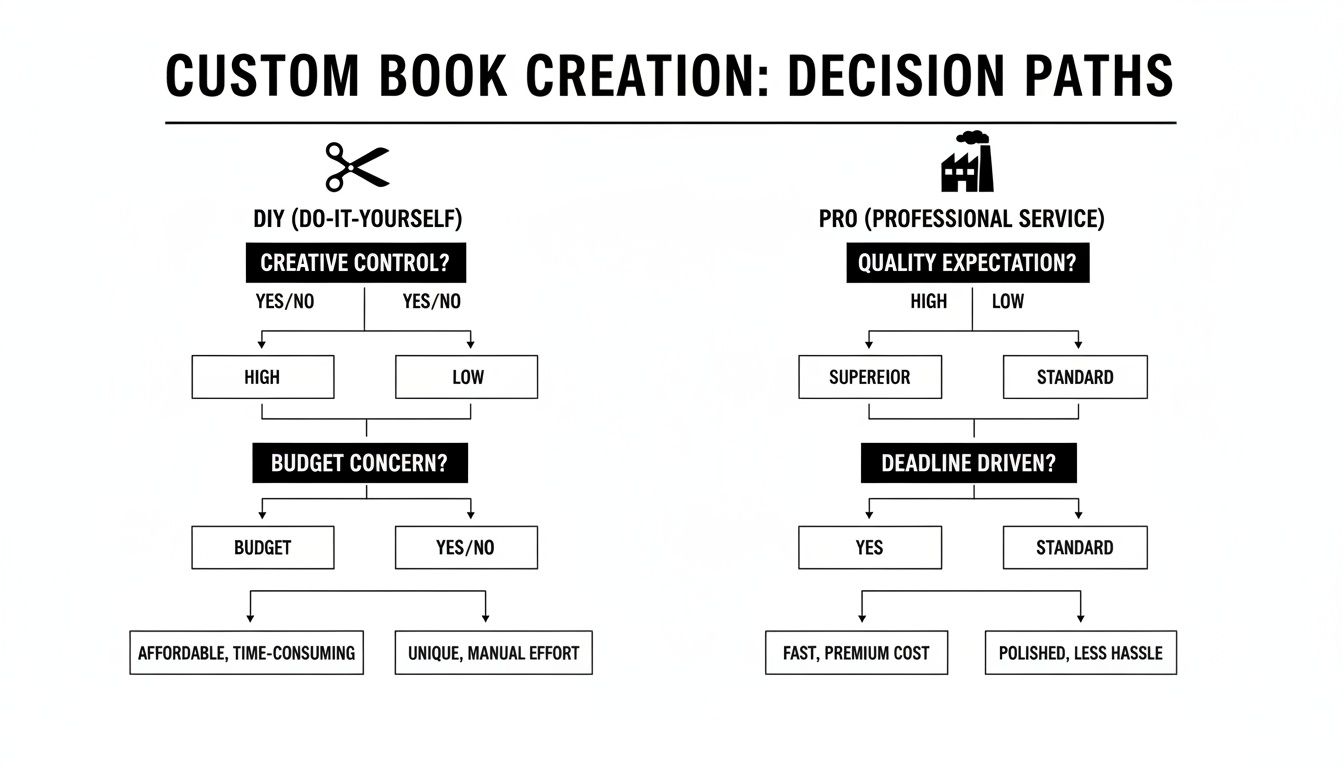
As you can see, it really comes down to whether you value total creative control (DIY) or durability and a professional finish (professional service).
DIY vs Professional Printing: A Quick Comparison
To make the choice even clearer, here’s an at-a-glance comparison between a hands-on DIY approach and using a professional service. This should help you quickly figure out which path is the best fit for your project.
Feature | DIY (Do-It-Yourself) | Professional Service (e.g., Once Upon A Memory) |
|---|---|---|
Final Quality | Handmade charm, but may lack professional polish. | Bookstore-quality with a polished, professional finish. |
Durability | Varies based on materials; may not withstand heavy use. | Highly durable, designed to be chew-proof and tear-proof. |
Child Safety | Depends on materials used (inks, adhesives, corners). | Uses non-toxic inks and rounded corners for child safety. |
Time Investment | High. Requires significant time for crafting & assembly. | Low. Design online in minutes, and the book is shipped. |
Cost | Can be low, depending on the craft supplies you have. | Higher initial cost, but includes printing and binding. |
Creative Control | Total control over every element, shape, and texture. | Guided creativity within a user-friendly editor. |
Best For | Crafty parents who want a unique, personal project. | Busy parents wanting a high-quality, long-lasting gift. |
Ultimately, both options lead to a beautiful, personalized book. One path gives you a crafty afternoon project, while the other delivers a timeless keepsake with zero fuss.
If you’re leaning toward a professionally printed book, you can get a closer look at the process in our guide on how to create a custom board book with Once Upon A Memory.
Crafting a Story Your Child Will Love
The real heart of a custom board book isn't some grand, complex adventure—it's the story. And for toddlers, the most captivating tales are the ones rooted in their own simple, everyday world. Before you start writing, just think about what makes your child’s eyes light up. That’s where your best story ideas are hiding.
When you board book make your own, lean into familiar routines and sweet, small moments. A regular trip to the park, a visit with grandparents, or even the bedtime routine can feel like an epic saga from a toddler's point of view. These relatable themes are powerful because they help kids connect the book to their own lives, which is a huge boost for engagement and understanding.
Finding Your Narrative Spark
Feeling stuck on where to begin? Just start by jotting down moments that are uniquely your family. Don't worry about a complicated plot. The goal here is to capture a feeling or a memory, not to write a novel.
Here are a few age-appropriate themes that almost always resonate with little ones:
A Special Outing: Think "Leo's First Beach Trip." You could chronicle the feeling of squishy sand, the sound of the waves, and the pure joy of splashing in the water for the very first time.
Family Connections: A story like "Helping in Grandma's Garden" is perfect for highlighting teamwork, the thrill of discovery (worms!), and the special bond between generations.
Celebrating a Milestone: Documenting a first birthday, learning to ride a tricycle, or the day a new pet came home creates a powerful narrative of growth that they'll love looking back on.
Daily Routines: A book titled something like "Good Morning, Sun!" can turn the simple steps of waking up, brushing teeth, and eating breakfast into a comforting, predictable story they'll ask for again and again.
The most cherished stories are often the simplest. By focusing on real-life events, you create a narrative that is not only deeply personal but also reinforces your child's sense of self and their place within the family.
Structuring Your Simple Story
Once you have a theme, all you need is a basic story structure: a clear beginning, middle, and end. For a toddler, this can be incredibly straightforward. A simple three-part structure makes the story easy for them to follow and, eventually, "read" back to you.
Let’s take "Leo's First Beach Trip" and map it out:
The Beginning: Waking up, feeling excited, and packing the car with beach toys and a bright red bucket.
The Middle: Arriving at the beach, feeling the warm sand, splashing in the gentle waves, and building a lopsided sandcastle with Dad.
The End: Feeling tired but happy, eating a sandy sandwich, and falling asleep in the car on the way home.
This simple arc gives the story a satisfying shape that a young child can easily grasp.
When it comes to the actual words, keep it simple, repetitive, and rhythmic. Young children thrive on repetition—it helps them predict what comes next and lets them join in on the storytelling. Stick to short sentences and maybe introduce one or two new descriptive words per page, like "squishy sand" or "salty air." This approach makes the story fun and engaging while building their vocabulary in a totally natural way.
Choosing Photos That Tell Your Story
While the words you write set the scene, the photos are what make a custom board book truly magical. They're the heart of the story, turning simple sentences into a vibrant, emotional journey your child can see and touch. When you board book make your own, picking the right pictures is one of the most important—and fun—parts of the process.

Think of yourself as the director of a tiny movie. Your job is to find photos that not only match the words but also grab a toddler's attention. I always look for images that are bright, clear, and focused on one main thing—like a super close-up of your baby's gummy smile or their little hands digging in the sand.
Curating a Cohesive Visual Narrative
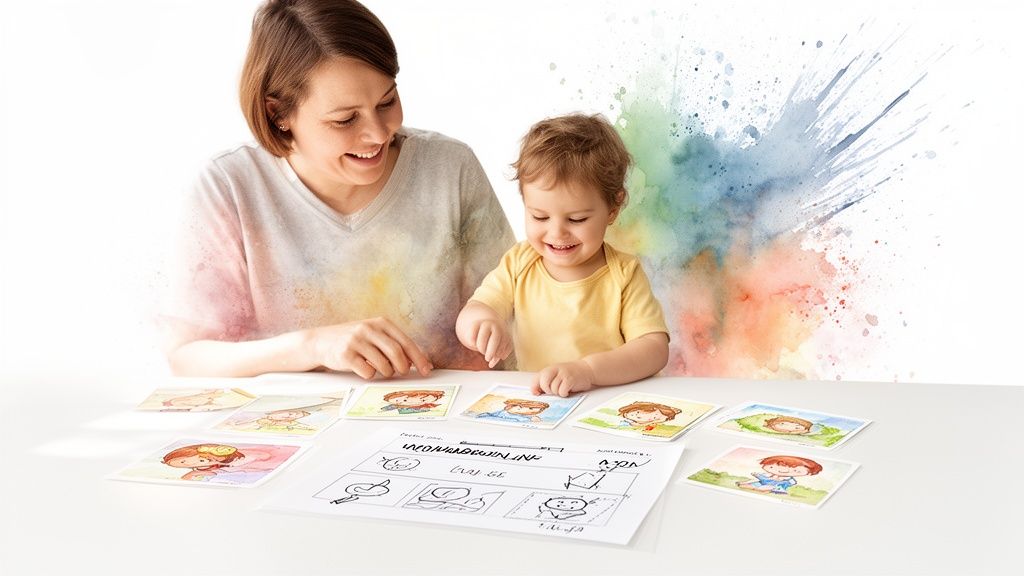
To make sure the book flows well, I recommend laying out all your chosen photos in story order before you even start designing. This simple step lets you see how the images work together. Do they tell a clear story from beginning to end?
Vary Your Shots: Don't use all close-ups or all wide shots. Mix it up! Try pairing a photo of your toddler's face smeared with birthday cake with a wider shot of the whole family singing around the table. It adds so much visual interest.
Check for Consistency: A book feels much more polished when the photos have a similar feel. Try to pick pictures with consistent lighting and color tones if you can.
Prioritize Emotion: Honestly, the best photos are the ones that capture real feelings—giggles, surprise, or a quiet, tender hug. Those are the images that will connect with your child year after year.
Your photo collection is the visual backbone of the story. Each image should act like a stepping stone, guiding your child through the narrative one delightful picture at a time.
Simple Steps for Photo Preparation
You don't need to be a professional photographer to get your images ready. A few small tweaks can turn a good photo into a great one.
Focus on simple edits that make the photo clearer and more impactful. Cropping out a distracting background can instantly draw your eye to your child's expression. A slight boost in brightness can make the colors pop right off the page, which is perfect for keeping little eyes engaged. For a deeper dive, we have a whole guide on creating personalized story books with photos.
It's no surprise these keepsakes are so popular—in fact, 41% of US families created a personalized book in 2024. This is all part of a booming children's publishing industry, which is projected to hit $3.3 billion by 2025. It's amazing to see so many families capturing their memories this way.
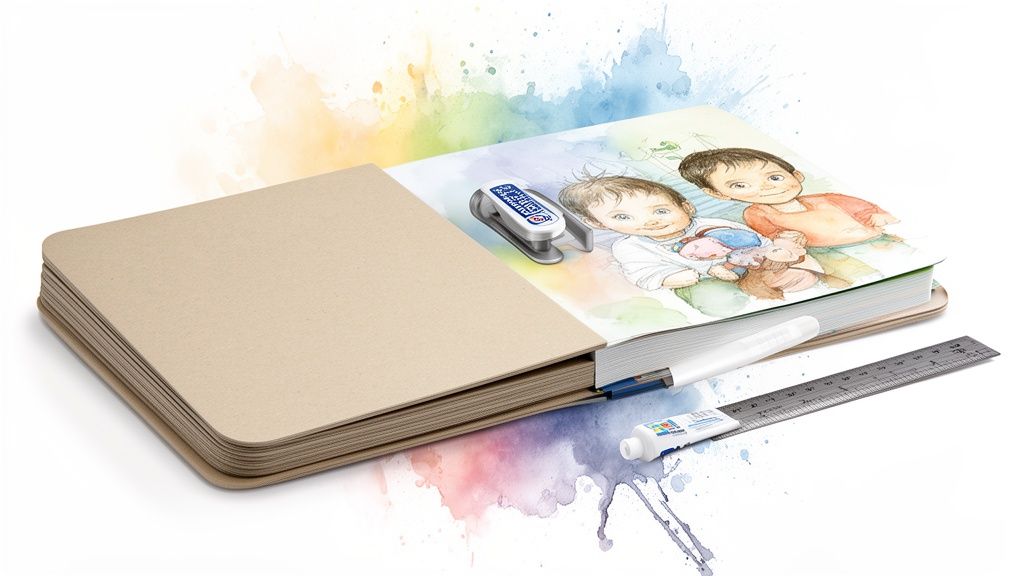
Building a Book That Lasts
Let's be honest: when you decide to make your own board book, you’re creating something that will probably be dropped, chewed on, and loved with sticky fingers. Durability and safety aren’t just nice extras—they’re everything. Your beautiful story deserves a final product that can survive the enthusiastic, hands-on attention of a toddler.
Whether you're going the full DIY route or choosing a professional service, the goal is the same: create a book that’s built for countless story times. The materials you pick and how you put them together will determine if your keepsake lasts for months or for years.
Here's how to make smart choices for both durability and child safety, ensuring your creation is as tough as it is tender.
The DIY Approach to Durability
Crafting a durable board book by hand is an incredibly rewarding project, but it all comes down to your supplies. The right materials will make all the difference between a book that falls apart after one read-through and one that becomes a well-loved staple.
First up is your page material. Regular paper or even standard cardstock just won't hold up. You need something with serious heft, like a thick, multi-ply chipboard or heavy-duty cardstock. Think of the thickness of a high-quality puzzle piece—that's the sturdiness you're aiming for.
Next comes the glue. Not all adhesives are created equal, especially when tiny mouths are a factor.
Choose a Non-Toxic Adhesive: Look for glues or sprays clearly labeled as non-toxic, acid-free, and ASTM D-4236 compliant. This is the official standard ensuring they are safe for children's products.
Ensure a Strong Bond: A PVA glue (often sold as bookbinding glue) or a high-quality spray adhesive will give you that permanent, even bond that prevents pages from peeling apart.
Apply It Evenly: Lumps or dry spots are your enemy. Uneven glue application can lead to weak spots or bubbles. Use a small roller or a brush to apply a thin, consistent layer across the entire surface before pressing your pages together.
Safety should always be your top priority. From rounded corners to non-toxic materials, every choice you make contributes to a book that is safe for your child to explore independently.
Professional Printing for a Polished Finish
If you opt for a service like Once Upon a Memory, the durability and safety checks have already been done for you. These companies specialize in creating products for little kids, so they stick to strict manufacturing standards. When comparing services, there are a few key features that signal a high-quality, long-lasting book.
The pages themselves should be thick, sturdy, and resistant to bending or tearing. High-quality services use materials specifically designed to be chew-proof and wipeable—an absolute must-have for any book that lives in a toddler's world.
Another critical element is the ink. The printing process should use vibrant, kid-safe, non-toxic inks that won't fade over time or pose a health risk if (let’s be real, when) the book gets tasted.
Finally, check out the binding. A professionally bound book should lay flat when open, and the spine should be robust enough to handle being opened and closed hundreds of times without cracking or weakening.
Not everyone has the time, patience, or craft supplies to assemble a board book from scratch. And that’s completely okay! If the DIY route feels like a bit much, you can get the same heartfelt result—without the glue and scissors—by using an online book builder.
Tools like Once Upon A Memory are designed to do the heavy lifting for you, turning your photos and ideas into a beautiful, professionally printed board book. It’s the perfect blend of a personal, custom story with the durable, polished quality you'd find in a bookstore.
Basically, you get to board book make your own masterpiece without any of the crafting chaos.
Let Smart Tech Do the First Draft
Getting started is surprisingly simple. The whole idea is to let the technology handle the initial storytelling, giving you a wonderful foundation that you can then perfect.
Let's imagine you want to create a book about your child’s first birthday. You’d start by uploading a handful of your favorite photos from the day—the cake smash, opening gifts with Grandma, the sleepy post-party cuddles.
Then, you just provide a few key details:
Who is the main character? (Your child's name)
What is the occasion? (First birthday party)
What are some key moments? (Blowing out the candle, playing with a new teddy bear)
With just that little bit of information, the AI gets to work, generating a complete first draft of your story. It intelligently weaves a narrative that connects your photos into a cohesive, heartwarming tale.
This kind of personalization is a huge part of why people love creating their own books. The global books market is expected to hit $142.72 billion in 2025, and custom stories are a big driver. In fact, global sales of custom children's books jumped 28% between 2022 and 2024 as more families discovered how easy it is to turn their own memories into stories.
Now, You’re in the Creative Driver’s Seat
That AI-generated draft? It's just the beginning. The real magic happens in the editor, where you have complete control to make the book perfectly yours. You’re not just stuck with a template; you get to personalize every single detail.
Here’s a peek at the kind of simple, intuitive interface you’ll see when you start your project.
This clean layout makes it easy to see your photos, text, and design elements all in one place, so you can focus on the fun part.
Once your first draft is ready, you can dive in and make it shine.
Think of the AI as your creative assistant. It builds the foundation, but you are the final storyteller, ensuring every word and every image feels completely authentic to your family.
You can easily tweak the text on each page, swap out photos for better ones, or even adjust the custom illustrations that the AI adds to complement your story. If a sentence doesn't sound quite like you, rewrite it. If you remember a better picture, just upload it.
This level of control is what turns a cute project into a truly personal keepsake. For a deeper dive, check out our guide on how to create a children’s book online for even more tips and tricks.
Answering Your Top Questions About Making a Board Book
Jumping into a creative project like this is exciting, but it’s totally normal to have a few questions before you start. Let's walk through some of the common things parents ask, so you can feel confident turning your family’s memories into a beautiful little book.
What’s the Best Length for a Custom Board Book?
For toddlers and preschoolers, shorter is almost always sweeter. Their little attention spans are still developing, so a quick, engaging story beats a long one every time.
I always suggest aiming for a book between 10 and 16 pages. That’s the sweet spot for telling a simple story with a clear beginning, middle, and end without overwhelming your tiny reader. A 12-page book, for example, gives you a front and back cover, plus five two-page spreads to tell your tale—often, that’s just right.
How Many Words Should I Write per Page?
Simplicity is your best friend here. Think of the words as supporting the photo, not the other way around. Sticking to one or two short sentences per page—around 20-25 words max—is perfect.
Let's say you're making a book about getting a new puppy. You could write:
Good: "This is our new puppy, Gus. He is fluffy and sweet." (It’s simple, direct, and easy for a little one to follow along.)
Too Much: "After a long car ride, we finally brought home our brand new puppy, whose name is Gus, and he has very fluffy fur and a sweet personality." (That’s a mouthful for a toddler to process!)
When the language is simple and has a nice rhythm, the story becomes more memorable. You’ll be surprised how quickly they start "reading" it back to you.
What Photo Resolution Should I Use?
To get that beautiful, crisp look in print, you’ll want to use high-resolution photos. An image that looks perfectly fine on your phone screen can sometimes turn out blurry or pixelated on a printed page.
For the best results, make sure your photos are at least 300 DPI (dots per inch). Most modern smartphones take fantastic pictures, but always try to use the original, full-size file. Photos sent over text or downloaded from social media are often compressed and lose quality.
Here’s a simple rule of thumb I always follow: If a photo looks even a little bit fuzzy when you zoom in on your computer, it probably won’t print well. Always pick the sharpest, clearest images you have. It makes all the difference.
Can I Use Old or Scanned Photographs?
Absolutely! Using old family photos is one of my favorite ways to make a book. It’s such a sweet way to connect your child with their grandparents, great-grandparents, and family history. If you have physical prints, you'll just need to scan them first.
Here’s how to get the best quality from a scanned photo:
Gently wipe the photo with a soft, dry cloth to get rid of any dust.
Set your scanner to a high resolution. I recommend at least 600 DPI for older prints, as it helps capture all those precious details.
Save the scanned image as a high-quality file, like a TIFF or a high-resolution JPEG.
Taking these extra steps ensures those treasured memories look just as beautiful in your board book as they do in real life. Imagine a book showing pictures of Grandma when she was a little girl—it’s an instant family heirloom.
Ready to stop wondering and start creating? With the Once Upon A Memory online editor, you can easily upload your favorite photos, get a little help from AI to write your story, and design a beautiful, durable board book your child will cherish for years.


