Blog
Make your own baby board book: A simple, safe keepsake guide
Make your own baby board book with this guide. Get tips on materials, assembly, and creating a safe keepsake.

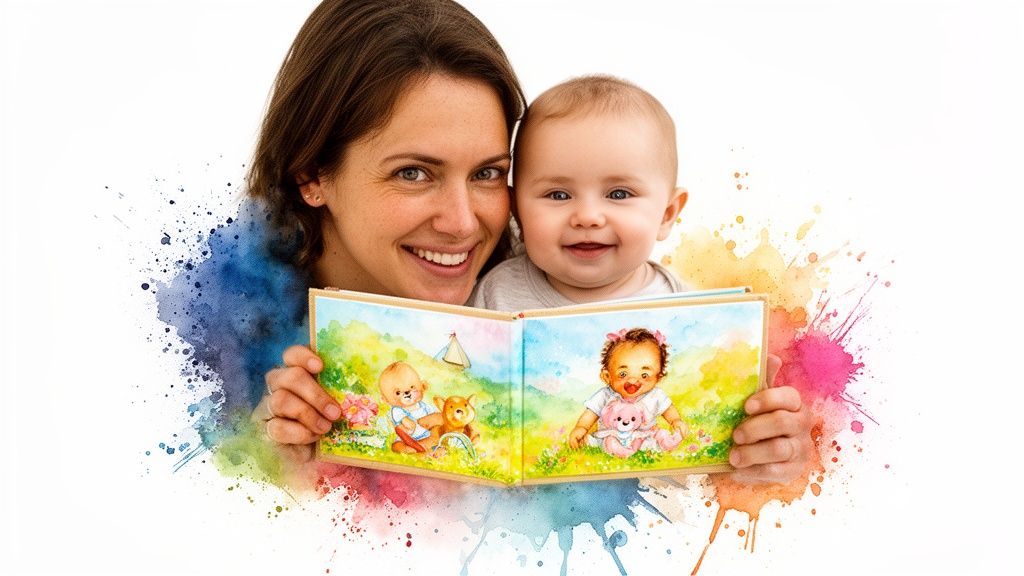
There's nothing quite like a book that mirrors your baby's own little world. Making a personalized board book transforms your everyday family photos into a durable, chew-safe keepsake that tells a story only you can. It’s a beautiful way to capture memories and introduce your child to the magic of reading from day one.
This guide will walk you through the whole DIY process, from dreaming up your story to putting the finished book together.
The Unique Joy of a Custom Board Book
Seeing familiar faces, places, and pets on the page creates such a powerful connection to reading. It’s more than just a craft project; you're building a foundation for literacy and creating a powerful bonding moment every time you read it together.
My goal here is to give you everything you need to make your own baby board book from scratch. We’ll cover it all, from brainstorming ideas to the final safety checks.
Why Personalized Stories Matter
A custom book isn't just a sweet novelty—it's a genuine developmental tool. When babies see themselves and their loved ones in a book, it strengthens their sense of identity and belonging. That personal connection makes story time so much more engaging.
Here are a few of the biggest wins:
Vocabulary Building: Naming Grandma, the dog, or a favorite toy in the book helps your baby learn new words in a context that’s already meaningful to them.
Emotional Connection: Reading a book about their own life builds a warm, positive association with books and strengthens that incredible bond between you and your child.
Enhanced Engagement: Let's be honest, stories featuring familiar faces are way more likely to hold a baby’s attention, which means longer and more frequent reading sessions.
The demand for these one-of-a-kind stories is exploding. Personalization is completely changing children's literature, with the U.S. market valued at USD 661.49 million in 2024 and projected to soar to USD 1,128.52 million by 2032.
What to Expect From This Guide
This guide is all about the hands-on, DIY approach. The creative process of picking out photos and weaving them into a narrative is a deeply rewarding experience in itself. You'll learn some practical skills and end up with a family heirloom that's truly priceless.
But I get it—not everyone has the time for a big craft project. For those looking for a simpler path, we'll also touch on services that can handle the printing and assembly for you. While we're focusing on DIY, checking out professional book printing services can give you a good baseline for quality and what's possible.
Ready? Let’s start turning those precious memories into a tangible story.
Crafting Your Story and Choosing Photos

Before you touch a single piece of paper or open a design program, let's talk about the heart of your project: the story. Every great book starts with a spark of an idea, and this is the step that turns a collection of photos into a true family treasure.
The best themes are the simplest ones—rooted in love, daily routines, and the faces your baby already knows. It’s those everyday moments that create the most powerful connections when a child sees them on the page.
Brainstorming Your Book's Theme
Start by thinking about what your baby is absolutely fascinated by right now. Is it the family dog? The faces of their grandparents on a video call? Tapping into their little world is a surefire way to grab their attention.
Here are a few ideas that are always a hit:
A Day in My Life: Follow the simple rhythm of your baby's day—from waking up and eating breakfast to bath time and bedtime stories.
My Favorite People and Pets: Dedicate a page to each important person (Mommy, Daddy, Grandma) and animal in their life.
A Tour of Our Home: Explore familiar rooms, from their cozy crib to the high chair in the kitchen.
Learning My ABCs or 123s: Use personal photos to illustrate letters or numbers. Think "A is for Auntie" or "3 for our three cats."
Once you have a theme, you can start pairing photos with ideas. For a "Day in My Life" book, you might find a picture of them yawning for "Wake Up," splashing in the tub for "Bath Time," and cuddling a teddy bear for "Goodnight."
Selecting the Perfect Photos
The photos are the stars of the show. For a baby, bright, high-contrast images with clear subjects are the most engaging. A blurry or dark picture might feel sentimental to you, but it just won’t hold a baby's focus.
When you make your own baby board book, hunt for photos that are:
Bright and Well-Lit: Natural light is your best friend. Photos taken outside or near a sunny window are almost always the clearest and most vibrant.
Simple and Uncluttered: Choose images where your baby or the subject is the main focus, without a busy, distracting background.
Full of Expression: Close-ups of smiling, laughing, or even surprised faces are captivating for babies who are just starting to recognize emotions.
If you’re planning ahead, mastering a few essential newborn photo session tips can make a world of difference in capturing those flawless, fleeting moments. Aim for the kind of quality you see in professionally printed books.
Writing Simple, Rhythmic Text
The words you choose are just as important as the pictures. The goal isn't a complex story but simple, rhythmic text that’s comforting and easy for little ears to follow.
Think in short, punchy sentences. Repetition is your best friend here—it's a powerhouse for early language development. Phrases like "Who do we love? We love Grandpa!" on one page, followed by "Who do we love? We love our puppy!" on the next, create a predictable and fun pattern.
The most effective baby board book text is more like a song than a story. A simple, repetitive cadence helps babies anticipate what's coming next, which is a key part of early literacy and engagement.
Stick to simple, concrete words. Instead of, "We are having a pleasant afternoon at the park," try something more direct, like "Look! A big, red slide. We go whee!" This kind of language is much easier for a baby to connect to the photo. Your story doesn't need to be fancy; it just needs to be full of love.
Gathering Your DIY Board Book Materials
With your story mapped out, it’s time to become a craft supply detective. This is, without a doubt, the most important step for making sure your book can survive enthusiastic page-turns, curious chewing, and a whole lot of love from its tiny owner. The choices you make here will define the book's durability, safety, and that professional feel we're all aiming for.
The good news? You don’t need a fancy workshop to make your own baby board book. Most of these supplies are easy to find at craft stores or online. The trick is knowing exactly what to look for to ensure every piece is baby-safe and built to last.
The Foundation: Strong Chipboard Pages
The heart of any board book is, well, the board! You’ll need chipboard, a dense, pressed paperboard that gives the pages their signature stiffness. Steer clear of flimsy stuff like regular cardstock or cereal boxes—they’ll bend and crease almost immediately.
Look for a medium to heavyweight chipboard. It’s usually sold by thickness (in millimeters) or points (pt).
A good starting point: 1.5mm (or 60pt) chipboard gives you decent stiffness for a homemade book. It feels solid without being too difficult to cut at home.
For a professional feel: If you want pages that feel like they came straight from a bookstore, go for 2mm (or 80pt) chipboard. It’s incredibly sturdy and almost impossible for a baby to bend.
You can usually find chipboard in large sheets, like 12x12 inches, which you can then cut down to your book's page size.
Choosing Paper and Protective Layers
The paper you print your photos and text on is what will make your book’s pages pop with color. A standard sheet of printer paper is far too thin and will likely wrinkle when you glue it down. You’ll want to choose a high-quality photo paper or a heavy, smooth cardstock instead.
I’ve found that a matte or satin finish photo paper works best. High-gloss finishes can show every tiny fingerprint and create a nasty glare under reading lights.
Once printed, you have to protect those precious pages from drool and sticky fingers with a laminate. A wipeable, non-toxic laminate is completely non-negotiable for safety. Self-adhesive laminating sheets are a fantastic, DIY-friendly option that are easy to apply.
The appeal of these indestructible books is a major reason why the baby books market is so strong. It's projected to grow from around USD 2 billion in 2025 at a healthy 5% rate through 2033. Discover more insights about the baby books market and its growth.
A Quick Guide to Your Shopping List
To make it a little easier, here's a breakdown of the materials you'll need, comparing some budget-friendly options with ones that will give you a more professional result.
Essential Materials for Your DIY Board Book
Material | DIY Option 1 (Budget-Friendly) | DIY Option 2 (Pro-Quality) | Key Consideration |
|---|---|---|---|
Pages | 1.5mm (60pt) Chipboard | 2.0mm (80pt) Chipboard | Thicker chipboard is more durable but harder to cut. |
Prints | Heavy Cardstock (100 lb) | Satin or Matte Photo Paper | Photo paper delivers vibrant, true-to-life colors. |
Protection | Clear Self-Adhesive Laminating Sheets | Heat-Applied Laminate Film | Ensure it's certified non-toxic and BPA-free. |
Adhesive | Acid-Free Spray Adhesive | Professional Bookbinding Glue | Must be non-toxic and create a permanent, bubble-free bond. |
Choosing the right combination from this list will set you up for success and help you create a book that’s both beautiful and tough.
Adhesives and Essential Tools
The right glue is what holds your entire project together—literally. Your everyday school glue stick just won’t cut it; it doesn’t provide the permanent bond needed to stop pages from peeling apart after a few reads.
Look for an adhesive that is:
Non-toxic and acid-free: This is the most critical safety check. Babies put everything in their mouths!
Strong and permanent: A good bookbinding glue or a spray adhesive designed for paper crafts will create a smooth, bubble-free bond.
Dries clear: This prevents any ugly marks if a little bit seeps out from the edges.
Beyond the main materials, a few specific tools will take your project from a simple craft to a polished keepsake. For more ideas on what goes into a high-quality final product, our guide to customized baby books has some great inspiration.
Here are the must-have tools that make a huge difference:
Paper Trimmer: A rotary or guillotine-style trimmer is your best friend for getting perfectly straight, uniform cuts. Trying to use scissors almost always results in wavy, uneven pages.
Corner Rounder: This simple little punch is the secret to a professional look. It gets rid of sharp corners, making the book much safer and more comfortable for tiny hands.
Bone Folder: It might sound strange, but this tool is amazing for pressing the paper firmly onto the chipboard, squeezing out air bubbles and creating a strong, flat seal.
Investing in these few key items will make the assembly process so much smoother and give your DIY baby board book the durable, high-quality finish it truly deserves.
Assembling and Designing Your Pages
Alright, you've got your story planned and your materials are ready. Now for the fun part—this is where your idea starts to feel like a real book. We're going to lay out the pages, get them printed, and piece everything together into that sturdy little book you’ve been picturing.
Don't worry if you’re not a graphic designer. The best layouts for babies are clean, simple, and packed with contrast. The goal is to create something that a baby’s developing eyes can easily lock onto. Think big, bold pictures and clear, easy-to-read text.
This simple flowchart shows how the core pieces—pages, photos, and tools—all come together.
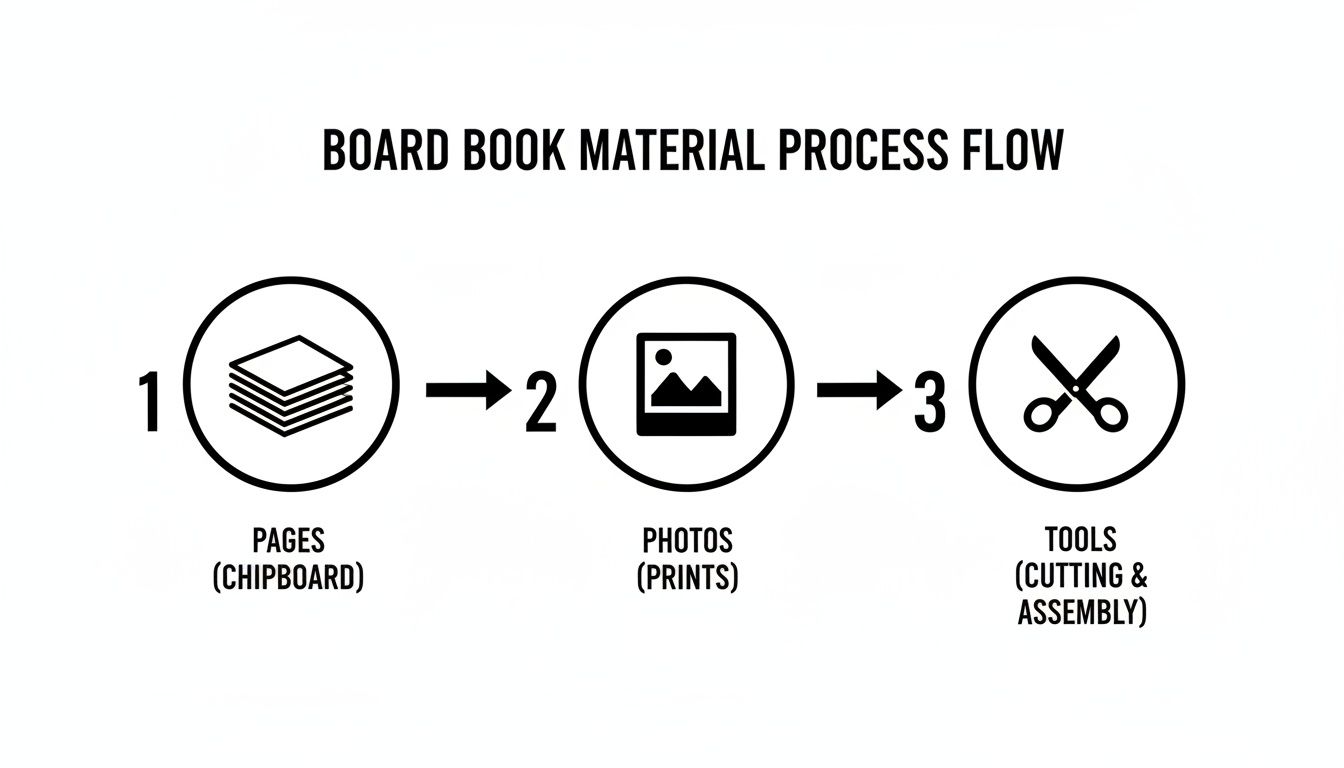
It’s really just a straightforward combination of a solid foundation (your chipboard), vibrant pictures (your photos), and the right finishing touches.
Designing Your Pages with Simple Tools
You absolutely do not need fancy, expensive software for this. A free tool like Canva is perfect. It’s incredibly intuitive, and you can easily set up a custom canvas size to match your book's dimensions right from the start.
As you start creating, keep these simple rules in mind:
One Photo Per Page: A single, high-quality photo is so much more impactful for a baby than a busy collage. It helps them focus.
High-Contrast Backgrounds: Place your photos against a simple, solid-colored background. A bright photo on a dark background (or vice-versa) creates that visual pop that really grabs a baby's attention.
Large, Clear Fonts: If you’re adding words, stick to a simple, rounded, sans-serif font. Something like Poppins or Century Gothic works beautifully. Make the text huge—at least 30-40pt—and place it where it won’t get lost in the photo.
Quick tip: Always leave a "safe zone" of at least a quarter-inch around the edges of each page. This little margin ensures nothing important gets accidentally sliced off when you do the final trim.
The Assembly Process, Step-by-Step
Once your digital layouts look good, it’s time to bring them to life. This is where patience pays off, especially if you want that polished, professional look.
First, print your pages. Use your chosen photo paper or heavy cardstock and make sure your printer is set to its highest quality setting for the most vibrant colors. Let the prints dry completely before you touch them to avoid any smudges.
Next up is gluing them to the chipboard. If you're using a spray adhesive, find a well-ventilated spot (or just go outside). Apply a thin, even coat to the back of your print and another to one side of a chipboard piece. Carefully line up one edge of the print with the chipboard, then smooth it down to push out any air bubbles.
My go-to trick is to use a bone folder or even the edge of a credit card to press the print firmly onto the board. I always work from the center out to the edges. This squeezes out any trapped air and gives you a perfectly flat, bubble-free page. It’s a tiny step that makes a world of difference.
Just repeat this for every page. If you're making two-sided pages, let the first side adhere completely before flipping it over and applying a print to the back.
Trimming and Finishing for Safety
With all your pages assembled, these last few steps are what will make your book both safe and durable. Crooked pages and sharp corners are the most common DIY pitfalls, but they're easy to sidestep.
A heavy-duty paper trimmer is your best friend here. It’s the only way to get perfectly square, uniform pages. Please don't rely on scissors; it's nearly impossible to get a straight cut through thick chipboard. Trim all your pages down to their final, identical size.
Now for the most important safety step: rounding the corners. A corner rounding punch is a cheap little tool that instantly gives your book that professional, kid-safe finish. Sharp corners can poke a baby, so this is a step you absolutely cannot skip.
Finally, if you decided to laminate, now’s the time. Slowly apply the self-adhesive sheets, smoothing as you go to avoid bubbles. Use a craft knife to trim any excess laminate from the edges for a clean, sealed look.
Taking these extra moments for precision ensures your creation is not just beautiful but also ready for countless hours of safe, happy reading. For more inspiration, check out our guide to create your own customizable book.
Binding and Finishing for a Durable Book
Your pages look fantastic, but they aren't quite a book yet. This is the moment where all your hard work comes together—the final stage that turns those individual pages into a cohesive keepsake that can survive endless story times.
Getting the binding right is what makes a book feel real. It’s what gives it a strong spine built to last and ensures it’s flexible enough for tiny hands. We’ll cover how to get that professional feel and, most importantly, run through the final safety checks before you hand it over.
Choosing Your DIY Binding Method
How you bind your book really comes down to the tools you have on hand and the look you’re going for. While you can get pretty fancy, a few simple methods work incredibly well for a homemade project and deliver durable, beautiful results.
For a first-timer, my go-to recommendation is always heavy-duty bookbinding tape. This isn't your average Scotch tape; it's a strong, flexible, cloth-based tape made specifically for this job.
Cloth Bookbinding Tape: This is the best option for your first book. It's forgiving to work with and creates a perfect, flexible hinge between pages. Plus, you can find it in all sorts of colors to match your design.
Duct Tape Binding: In a pinch, a high-quality, smooth duct tape can also do the trick. It's tough and water-resistant, but I've found it can be less flexible and sometimes leaves a sticky residue over the years.
While you could attempt a more advanced sewn binding, it requires special tools and is a real challenge with thick chipboard. Sticking with a strong tape-based method is the most practical and reliable choice for a DIY board book.
Creating a Strong and Flexible Spine
The secret to a great binding is creating a small, consistent gap between your pages. This tiny bit of space is what allows the pages to turn smoothly without putting stress on the spine itself.
Here’s a simple process I use with bookbinding tape:
Lay Out Your Pages: Arrange your finished pages in the correct order, face down on a flat surface.
Use Spacers: Grab a thin piece of leftover chipboard or even a couple of stacked credit cards to use as a spacer. You want a gap of about 1/8 inch (3mm) between each page—this is the sweet spot.
Apply the Tape: Cut a piece of bookbinding tape that’s a little longer than the height of your book. Carefully lay it down over the gaps, pressing it firmly into the little valleys between each page.
Wrap and Secure: Trim the excess tape at the top and bottom. Now, carefully fold your pages together like an accordion and apply another piece of tape to the front side of the hinges to make them extra strong.
This method creates a sturdy, flexible spine that mimics the feel of store-bought books, ensuring your creation opens smoothly and can lay flat for easy reading.
A well-made board book isn't just a craft; it's a part of a massive global market. The demand for durable baby books is a key driver in the industry, which was valued at around USD 2.1 billion in 2023 and is expected to hit USD 3.6 billion by 2032. You can learn more about these baby books market findings and see why durability is so important.
Final Safety and Quality Checks
Before you hand over your masterpiece, this final inspection is easily the most important step. Run your hands over every single surface. Feel for any peeling corners on the laminate, any sharp edges you might have missed, or any dried glue seeping from the seams.
This is your last chance to fix any little flaws. A small dab of non-toxic glue can secure a peeling corner, and a bit of fine-grit sandpaper can gently smooth any rough spots on the chipboard edges.
Your finished book should feel solid, smooth, and completely sealed. The pages should turn easily without catching or feeling stiff. This final quality check guarantees that your beautiful, personalized board book isn't just a wonderful story, but a completely safe toy for the baby you love.
Your heartfelt project is now ready to be read, chewed on, and cherished for years to come.
Common Questions About DIY Board Books
Starting a project to make your own baby board book is such a heartfelt idea. But let’s be honest, it also brings up a ton of questions. From making sure it’s safe enough for tiny hands (and mouths) to figuring out if it’s actually cheaper, let’s walk through the big ones. Getting these answers sorted out first will help you dive in with confidence.
Most of the worries I hear from parents boil down to two things: safety and durability. You’re pouring so much love into this, and you want it to last. It needs to survive some serious baby-love—which usually involves chewing, drooling, and some less-than-gentle page turns.
What Are the Best Materials for a Truly Durable DIY Board Book
If you want a book that feels as solid as one from a store, you’ll need to be picky about materials. For the core of the pages, go with a heavy-duty chipboard—at least 2mm or 80pt thick—to keep it from bending or tearing.
For the printed pages you'll glue on top, a high-quality, acid-free photo paper or a hefty cardstock (100lb/270gsm) works best. When you pair that with a protective, baby-safe laminate, you’ve created something that can stand up to just about anything your little one can throw at it (or chew on it).
How Can I Guarantee My Homemade Board Book Is Safe for a Baby
This is the most important part. Your number one priority has to be safety. Only use non-toxic, acid-free adhesives that are specifically marketed as child-safe. A corner rounding punch isn’t just nice to have; it’s a must-have for getting rid of sharp corners that could poke an eye or scratch delicate skin.
If you’re laminating the pages (which I highly recommend for durability), make sure the film is food-safe or CPSC-compliant. Before you hand it over, give the finished book a thorough once-over. Check for any peeling edges or loose bits that could become a choking hazard. Every single material, from the ink to the glue, should be chosen with your baby in mind.
One part of safety that often gets overlooked is digital privacy, especially when we're using personal photos for these projects. It's smart to know the difference between fear and fact when it comes to how your family's images are used online. Getting clear on common child photo AI privacy myths can give you real peace of mind.
Is It Cheaper to Make My Own Board Book or Buy a Custom One
This is the million-dollar question, and the answer isn't a simple yes or no. The raw materials for a single book might seem cheap at first, but the cost really climbs once you factor in the tools you'll need to buy.
Think about the one-time tool purchases required to do it right:
A quality paper trimmer for perfectly straight cuts
A corner rounder for safe, rounded edges
Specialty bookbinding glue or tape
A bone folder to get smooth, bubble-free adhesion
But the biggest cost isn't money—it's your time. Between the learning curve, designing the layout, and the careful, step-by-step assembly, you can easily sink several hours into just one book. For a single, high-quality project, a professional service is often surprisingly cost-effective and guarantees a polished, durable, and safe book without you having to buy a bunch of tools you might never use again.
What Is a Good Alternative if I Don't Have Time for This Project
If you love the idea of a personalized book but just don’t have the time or crafting energy, a custom board book service is the perfect solution. It’s the ideal bridge between a heartfelt, personal gift and a professionally made product that’s built to last.
You just upload your photos and text on their website, and they handle all the tricky parts—the professional printing, the sturdy assembly, and the binding. You get a beautiful, durable keepsake delivered right to your door, ready for storytime. It’s truly the best of both worlds: all the personal touches, with none of the hassle.
Ready for a personalized story without the DIY marathon? Once Upon A Memory Books turns your favorite photos and memories into a beautiful, professionally printed storybook your child will treasure. Let us handle the crafting while you focus on the cuddling. Create your custom storybook today!


